Appointment Calendar Overview
The Appointment Calendar also know as the Block Appointment Scheduler enables you to manage the time of clinic resources. Some walk-in activity is inevitable, but the more visits you can schedule, the less irregularity you will have in heavy and slow periods of activity.
The Appointment Calendar blocks out a pre-defined time for each appointment based on default time set up for each visit category.
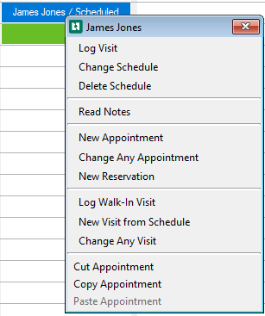
On an Existing Appointment the user can:
-
Log a Visit
-
Change the Schedule
-
Delete a Schedule
-
Read Note
-
Change Any Visit
-
Cut an appointment
-
Copy an Appointment
-
Add an Appointment Note
From a blank time slot the user can:
-
Schedule a New Appointment
-
Change any Appointment
-
Create a New Reservation
-
Log Walk-in Visit
-
New Visit from Scheduler
Select the hyperlink for more information on these topics:
Find Available Appointment Times
Reserve Time on the Appointment Calendar
How to Schedule Recurring Appointments and Exceptions
View Appointment Notes or Delete Appointment
Documenting a Cancellation or No Show
How to Schedule Recurring Appointments and Exceptions
Appointment and Visit Status Codes
Chart Prep Print Encounter Forms
Schedule File, Appointment Calendar, and Visit Records: An Overview
Viewing a Visit Category Protocol
Log a Visit From the Appointment Calendar
Change Visit From Appointment Calendar
Calendar Functions
-
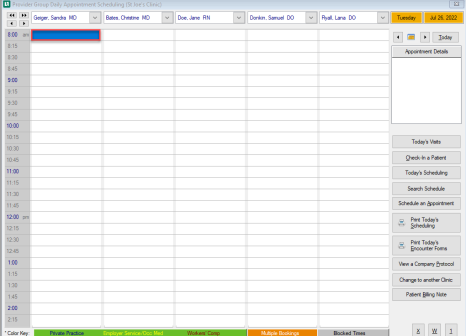
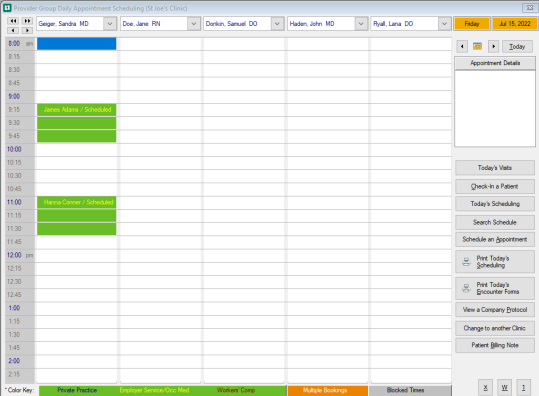
There are columns for displaying one, five, or ten practitioners at a time. If you have more than ten, you can change the one display in any column.
-
Below that are time slots. You can choose the number of minutes represented by each slot when the calendar is set up.
-
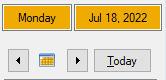
In the upper right you can see the date currently displayed. You can change that to view any day, past or future.
-
In the menu bar on the right are buttons for performing various scheduling functions.
-
And, of course, in the main body of the calendar are the times blocked out for patients.
-
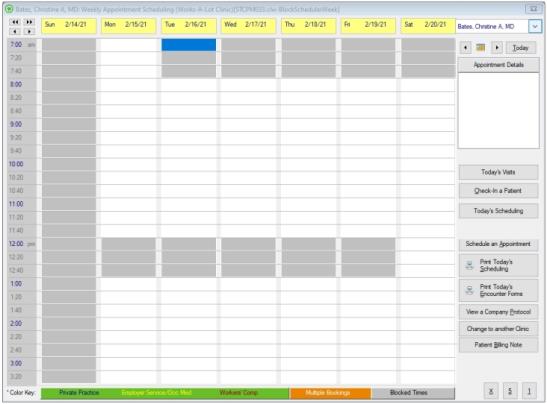
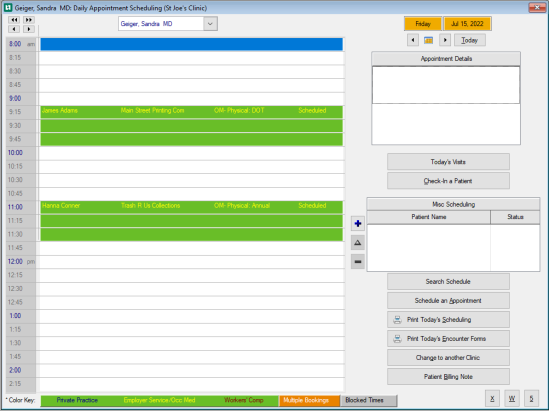
Patient names are in different colors to indicate the type of visit. The color key is at the bottom of the screen.

-
Segments in orange
 are for Multiple Bookings.
 -
Segments in gray are blocked times that are unavailable for scheduling.
-
The blue segment, here on the appointment is the cursor location.
Calendar Format
The Appointment Calendar allows the user to view it in 4 different formats. The default can be changed in the Clinic System Parameters on the Charting / Scheduling tab.
-
10-up Display - This shows the schedule for ten resources at a time, each in its own column. This is the default display. If you have more than ten providers/ clinicians use the dropdown to select the one you want to schedule for.
-
5-up Display: This shows the schedule for five resources at a time, each in its own column.
-
Weekly: This shows the schedule for a full week for one practitioner.
-
1-up Display: This shows a detailed display for one day for one practitioner. This can also display a group of clinicians if your clinicians were set up under Block Scheduling on the Enter Clinician window as Group Pooled instead of Individual Page.
-
Use
 to change to the other calendar formats, 10-up, weekly, or 1-up.
-
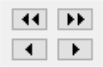
Select the VCR buttons that are in the upper left corner of the Calendar display.
-
-
The double arrows will page up or down and the single arrow will move an individual line up or down.
-
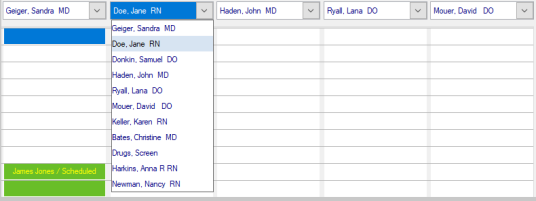
Use the dropdown next to the Provider or Resource to select a Different Provider or Resource to display.
-
A Resource can be:
-
A piece of equipment such as the audio booth.
-
When providers have irregular schedules that change a lot, it might be easiest to schedule not by name, but by "virtual practitioners" such as Physician 1 and Physician 2.
-
If you provide a very time consuming service such as a fire fighter's physical, you might have a column just for that activity to make sure that only a limited number get scheduled each day or week.
-
Going a step further, some clinics have schedule columns only for activities: Physicals, Vaccinations, Workers Comp Follow-up, etc.
-
-
-
The current date displays on all formats except the Weekly display This date can be changed by using the Calendar icon or using the VCR to move the date forward or backward. Use Today to return the user to the current date.
-
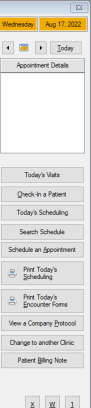
The Appointment Details section displays the information for a highlighted appointment.

-
On the 5 up and 10 up formats using the buttons on the right side of the Appointment Calendar the user can:
-
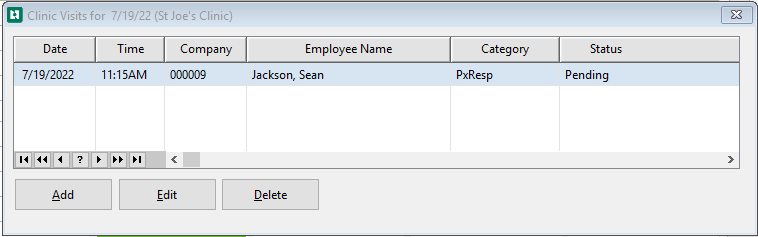
View Today's Visits - Opens the Clinic Visits for the day selected.
-
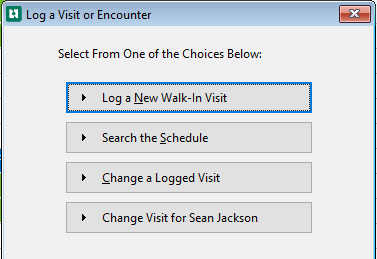
Check-in a Patient - Opens the Log a Visit or Encounter window.
-
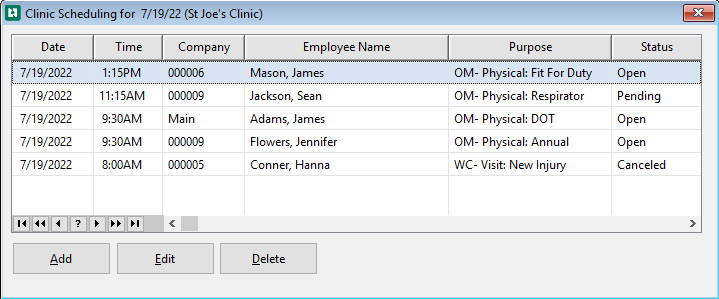
View Today's Scheduling - Opens the Clinic Scheduling for (date) window.
-
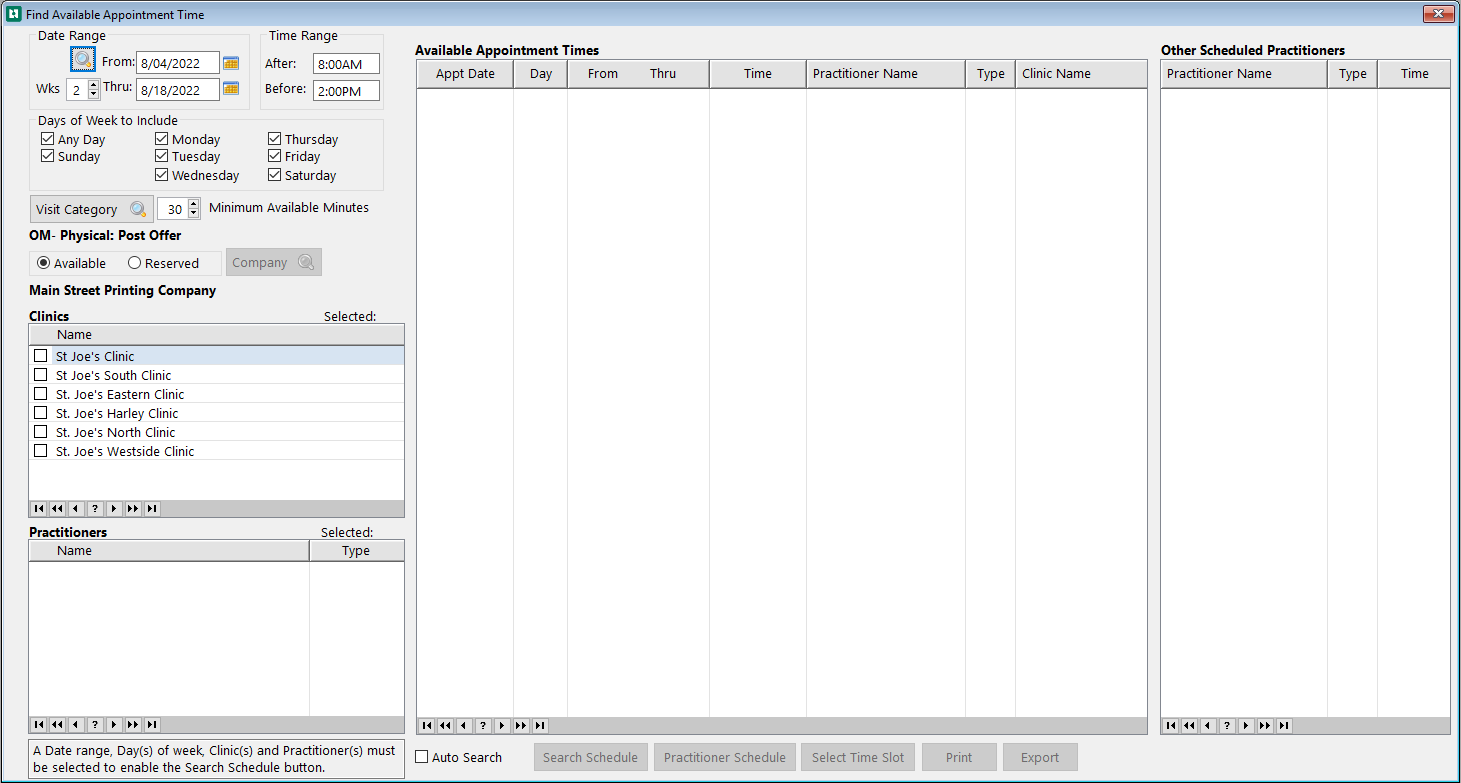
Search Schedule - Opens the Find Available Appointment Time window. See Find Available Appointment Time topic for more information.
-
Schedule an Appointment - Opens the Appointment Scheduling window.

-
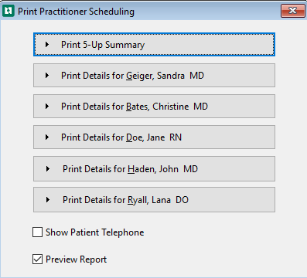
Print Today's Scheduling - Opens the Print Practitioner Scheduling window.
-
Print Today's Encounter Forms - The Print Encounter Forms window opens. The user can print for current clinic or across all clinics.

-
View a Company Protocol - The Select Company window opens. Select the company, and the Select Company Protocol window opens. Highlight the Protocol and select View. The Protocol opens and can be reviewed.

-
Change to Another Clinic - The Select Clinic or Treatment Site opens. Highlight the new Clinic and click Select.
-
View Billing Note - A patient must be selected from the Select Patient window. Another Select Patient window opens to the selected patient or a list of all patients