Schedule an Appointment
Scheduling
To schedule an appointment:
-
From the Home Nav bar
-
Select Appointments
-
The Provider Group Daily Appointment Scheduling window opens
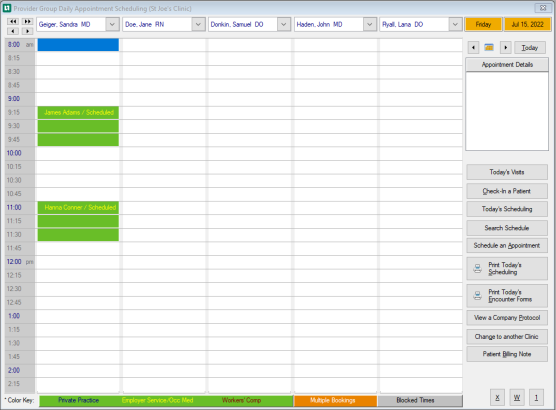
Select the VCR buttons  that are in the upper left corner of the Calendar display. The double arrows will page up or down and the single arrow will move an individual line up or down.
The Providers / Clinicians / Resources are listed across the top of the window, if there are more than the amount of columns use the dropdown to change them.
![]()
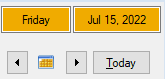
The date can be changed by using the VCR buttons to back up or advance the date. Select the Calendar to open the calendar and select the date. Use Today to return to the current date.
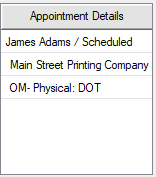
On the right side of the window is a section that displays the details of a scheduled appointment if it is selected.
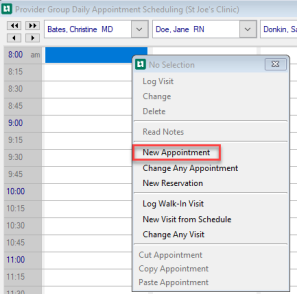
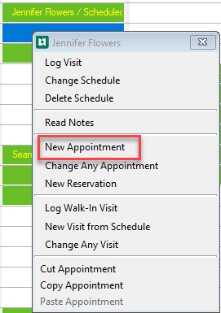
Locate the time slot to schedule the Appointment and right click to open a list of options select New Appointment.
The Select Patient window opens.
Enter the patient's information or select Search List.
The second Select Patient window opens listing all patients across the organization or if patient information was entered only patients that meet that criteria are listed.
Highlight the correct patient and click Select.
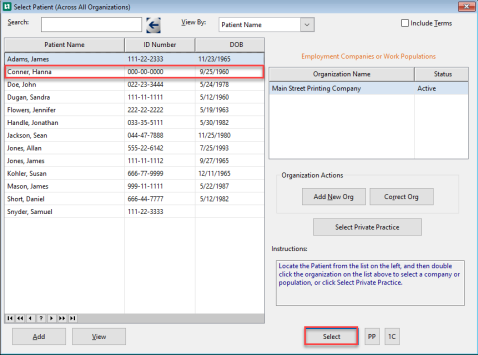
The Enter Appointment window opens.
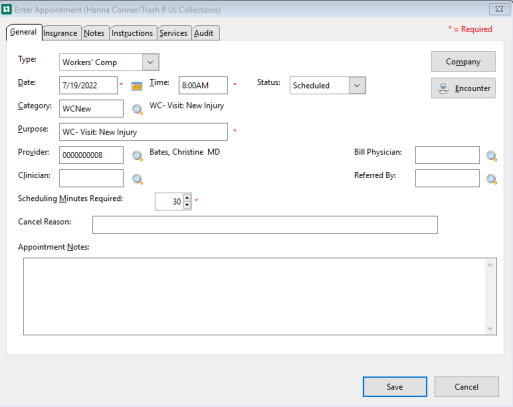
General Tab
| Section | Description |
|---|---|
| Type |
Can be changed using the dropdown:
|
| Date | The Date is a required fields and is already entered. It can be changed using the Calendar icon. |
| Time | The Time is a required fields and is already entered. It can be changed by manually entering the new time. |
| Status |
The Status is set to Scheduled by default and can be changed by using the dropdown
|
| Category |
Can be changed by manually entering the category or use the magnifying glass to open Select Visit Category Code window to select the new Category. When you select the visit category, an INSTRUCTIONS tab will appear at the top of the window. Click on this tab and read the instructions for the appointment. |
| Purpose | Auto populates from the Category selected. |
| Provider | Can be changed use the magnifying glass to open the Select Provider window and select a different provider. |
| Clinician | Can be added or changed by using the magnifying glass to open the Select Clinician window to select a clinician |
| Billing Physician |
If the selected Provider has a Billing Physician already setup (linked) with it, that physician will auto-fill in the field "Billing Physician". Users still have the ability to override the auto-filled entry by selecting another Billing Provider using the magnifying glass to the right. |
| Referred By |
Can be added or changed using the magnifying glass to open the Select Provider window to select a provider. |
| Scheduling Minutes Required | The time displayed is defined from the Visit Category selected but can be changed by using the arrows to increase or decrease the time. The maximum time allowed is 240 minutes. |
| Cancel Reason | Allows the user to manually enter a cancel reason into this field. |
| Appointment Note | Allows the user to manually enter any information needed for this patient / employee. If you entered a note, an asterisk will be displayed to the right of the visit category in the Appointment Details box on the right of the calendar. |
| Company |
Select to open the Select patient / employee Organization for the patient / employee the user wants to change.
|
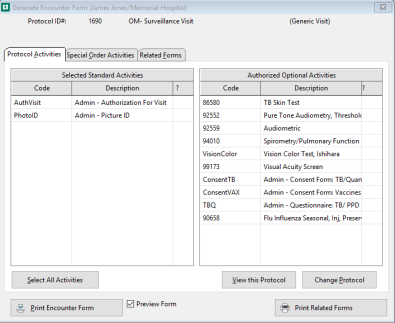
| Encounter |
Select to Add or Change activities for this appointment.
|

Insurance Tab
If patient insurance information is available at this time, click the Insurance tab and enter it.
The Instructions and Notes tabs are populated with information from Demographics.
-
Instructions contain information from the Encounter Form.
Services tab
Contains any services that were selected on the Encounter Form.
Audit Tab
Created By:
-
User who created the record
-
Date and time
Appointment was changed:
-
User who made the change
-
Date and time
The Employee ID, MedRecNo, or Hosp Acct if entered will display here.
Select Save to have the Appointment show on the Appointment Calendar.
Double Booking an Appointment
The software has the capacity to record up to 5 appointments at the same time for the same provider or resource.
-
If you double book, only the initial appointment will be displayed in the Calendar grid, and it will be highlighted in red.
-
However, all the other booked appointments are displayed on the right side on the [Appointment Scheduling] window in the Appointment Details.
To double book a block of time:
-
Right-click the in the block with the start time for the for the new appointment. (They do not have to start at the same time.)
-
On the pop-up menu, click New Appointment.
-
Enter the new appointment.
-
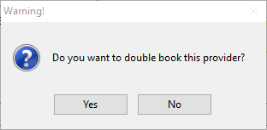
When you exit, you will be asked if you want to double-book. Click Yes.
-
On the calendar, the double-booked slots will be orange. If you highlight one, both appointments will show in the [Appointment Details] pane on the right.

-
Since an appointment might completely cover the other, the display in the [Appointment Details] can be treated as if it were the appointment.
-
You can drag it to another time slot.
-
You can double-click to view or edit the appointment.
-
You right-click on it, then click Log a Visit on the sub-menu that pops up, to check the patient in.
-
Moving An Appointment On the Same Day
An appointment can be dragged and dropped in a different slot on the calendar.
-
If moving to a different provider, first make sure the provider or resource to whom you want to move the appointment, is one of the five currently displayed on the calendar.
An alternative way to move is to drag the appointment from the [Appointment Details] pane on the right. This is especially useful for double booked blocks where the appointment you want to move might be hidden by another appointment.
-
Highlight the appointment to be moved, either under the provider or in the [Appointment Details] pane.
-
Drag and drop the appointment to the new time slot or new provider.
-
After releasing the appointment the Enter Appointment window displays. Review the time and provider then select Save.
Re-book the Appointment to a Different Day (Supervisor or Patient calls to re-book)
If needed, document the original schedule as a Cancellation or No Show, it is easier to delete the schedule record and start over to book a new appointment.
Follow instructions to schedule a New Appointment.
It is possible to re-book the appointment by simply changing the date and time on the Appointment Record. To do this, however, you must first look at that date/time to see if it is available, then return to the existing appointment record. This is why we suggest it is easier to delete the original appointment and go to the new date and time and start over.
Copying and Pasting Appointments
When scheduling follow-up appointments, the patient may require more than one appointment to be scheduled. To make it easier to schedule one or a series of follow-up appointments, the software lets you "copy and paste" an appointment into an unlimited number of future time slots. To do that, make the initial appointment in the normal manner.
To Copy or Cut and Paste Appointments:
-
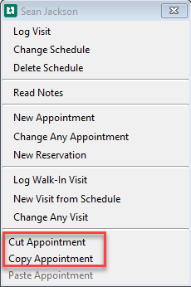
On the calendar, right click the appointment you wish to copy or cut.
-
Click Cut Appointment or Copy Appointment.
-
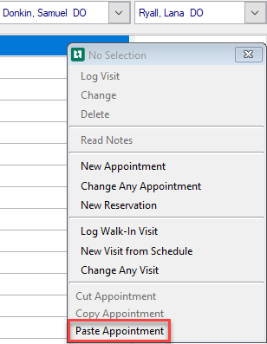
Move to the correct date for the appointment and right click the proper time slot under the desired provider.
-
Click Paste Appointment.
-
The Enter Appointment window opens verify the new date, time and provider are correct.
-
Click Save.
Email Notification
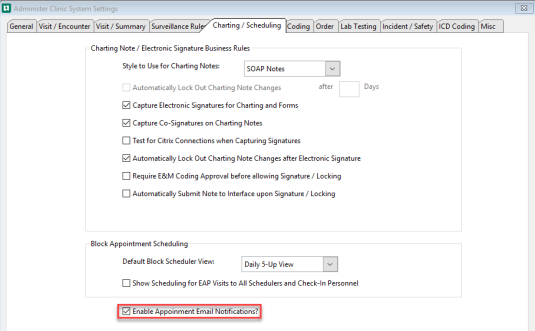
The ability to send email notification will be available only if on the Clinic System Parameters from the Charting / Scheduling tab Enable Appointment Email Notifications? is checked.
Send Notification Email to Patient may be selected at any time. An email will be automatically sent by the system to the patient's email address on file within the clinic database. The subject of the Email will be: "Appointment Notification".
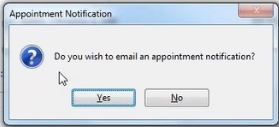
If an appointment is created, changed, or canceled, and the user selects Save, the system will prompt asking if you want an Email Notification sent.
If the Email notification fails in any way, a error message will display:
