Documenting Audiometry Testing
If you haven't already done so, please read Clinical Results Overview, Patient Check-Out Overview, Visit Activities Overview, and Set Up Trigger Entry for Audiometric Testing before continuing! Also, read How to Change Audiometry Parameters.
If you administer audiograms, and you either do not document any results, or you document only the final result of the audiogram, then this topic is not for you!
Summary
This topic addresses how to document the full details of an audiogram. If a baseline test has been previously entered, the program will automatically calculate when there has been a standard threshold shift or an OSHA recordable shift. Two documents, a Summary Test Form and an Employee Notification can be printed. The Audiogram medical activity requires special setup to enable the entry of detailed results.
The patient's history of audiograms can be seen on the clinical results tab of the view chart.
Steps to Document an Audiogram
-
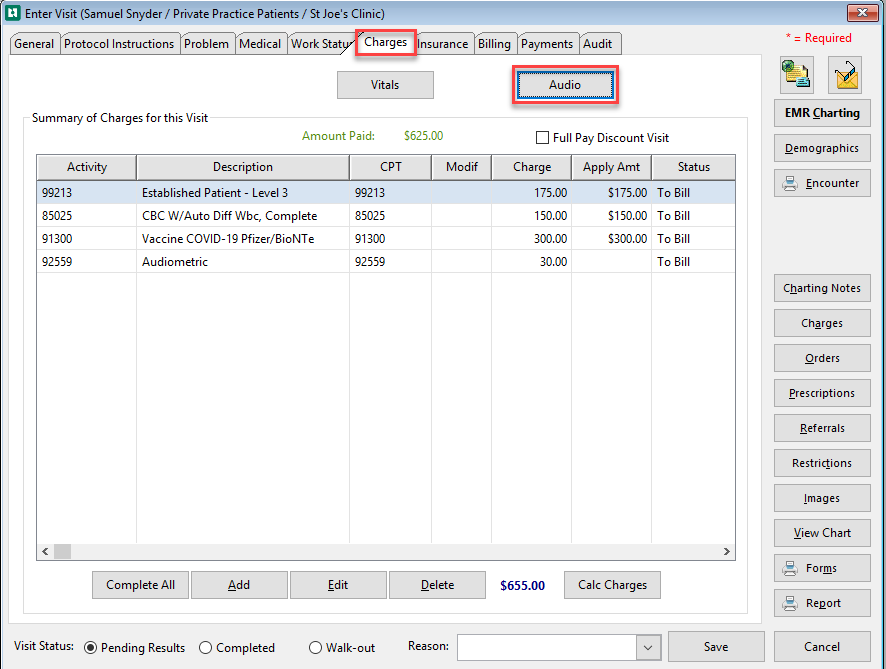
On the Enter Visit window
-
Select the Charges tab from the top of the window
-
Select Audio
-
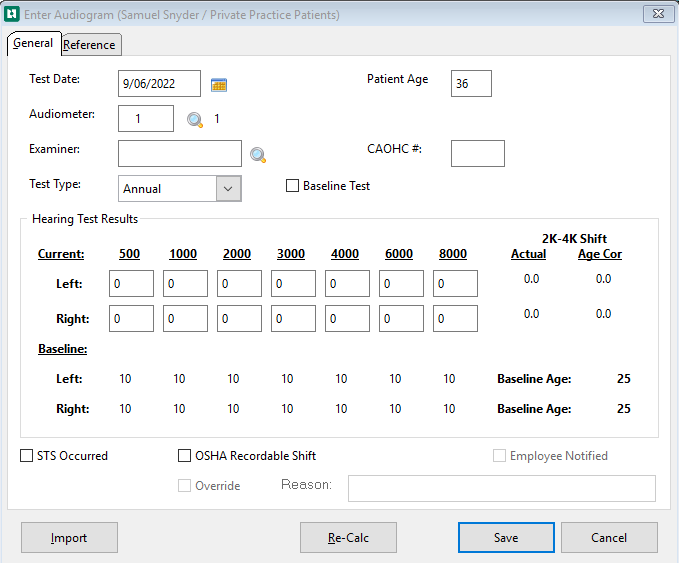
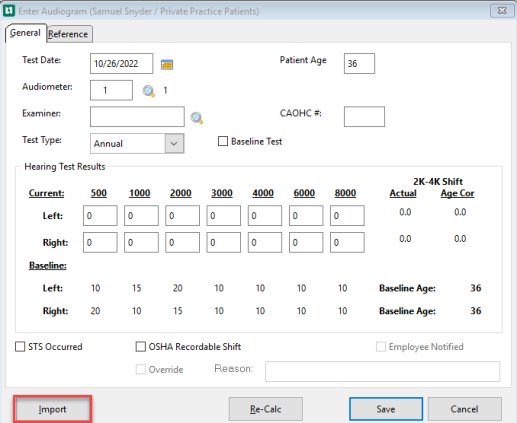
The Enter Audiogram window opens
-
Test Date is auto populated with date of the visit
-
Patient Age auto populates
-
Use the magnifying glass to select the Audiometer to be used for the test.
Once you select your device, if you are using a customizable file definition, make sure your device is using the correct format that matches your import file layout exactly. See How to Change Audiometry System Parameters.
-
Use the magnifying glass to select the Examiner
-
If the Examiner has a CAOHC ( Council for Accreditation in Occupational Hearing Conservationist) number it will auto populate.
-
Select the Test Type from the drop-down box
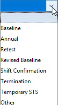 . The default is "blank".
 -
If you set Test Type to Revised Baseline, a field labeled Ear baseline revised for will appear.

By default, this is set to Both. If you have a previous baseline for this patient, and if there has been significant hearing loss in just one ear, you can change this test to be the baseline for just that one ear. When the next test is conducted, this test will be used as baseline in calculations for the ear with hearing loss on this test, and the previous test will be used as the baseline for the other ear.
-
If a STS shift occurs during a test the Test Type changes to Revised Baseline and the Baseline checkbox is checked and Ear baseline revised for displays the ear or both for the shift.
-
At the bottom of the window STS Occurred and OSHA Recordable Shift check boxes are checked.
-
-
A Termination can be selected when the patient is terminated. If the employee is subsequently re-hired, a new baseline test can be entered and all future tests will compare to this new baseline.
-
Temporary STS will never be selected at the time when the test is conducted. It is used when a retest is conducted following an apparent STS, and the retest becomes the confirmed STS result. In that case, the earlier test result that was calculated to be an STS can be changed to Temporary STS. (This should never be selected for baseline or revised baseline tests.) When an audio test is changed to Temporary STS, it will be included on the All Hearing Test Conducted type of the Hearing Conservation Report, but will be filtered out and not included on all other variations of that report (ie. Standard Threshold Shifts, Recordable OSHA Shifts, etc.)
-
Check the Baseline check box if appropriate. The default is unchecked. If you are importing a record and it is flagged as a baseline record, it will import with the Baseline check box already checked.
-
Enter the responses for each frequency, for each ear.
-
By default, 99 = No Response and 999 = Not Tested.
-
These defaults can be changed from the [Audiometric Setup Parameters] screen.
-
If manually entering the data complete the Hearing Test Results Current section.
-
Select Save
The program will automatically check STS Occurred if appropriate. This can only happen if there is a previous baseline test entered in the software. It can be checked manually.
If an Import file is available, the button will display at the bottom left of the window. To import a file, click the Import button. This function will import and populate the patient record into data fields across multiple tabs of the Enter Audiometry Test window.
In order to attach a specific customized file format to a particular device, see How to Change Audiometry System Parameters.
The program will automatically check the OSHA Recordable Shift if appropriate. This can only happen if there is a previous baseline test entered in the software.
The Audiologist might determine that the STS is not due to noise but is a personal health condition and that therefore, it should not be OSHA recordable. In that case, the OSHA Recordable Shift should be unchecked, and the Override check box beneath it should be checked. Since the software recalculates when OK is clicked, OSHA Recordable Shift will be rechecked by the software if Override has not been checked. The STS flag will remain checked.
Click the Reference tab and update the calibration information, if needed. The software will display the information currently carried in the audiometer record, so it only needs to be entered if it has changed.

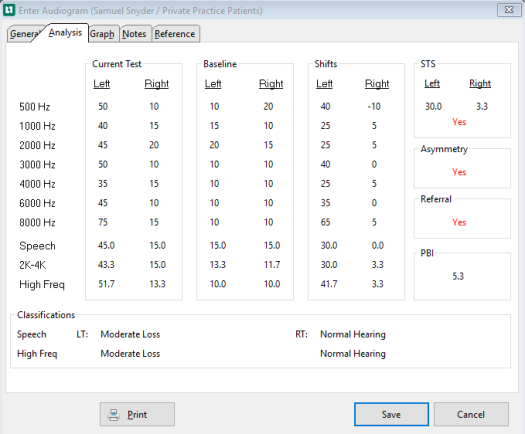
Click the Analysis tab to see the results of this test compared to a previous base line, if one has been entered.
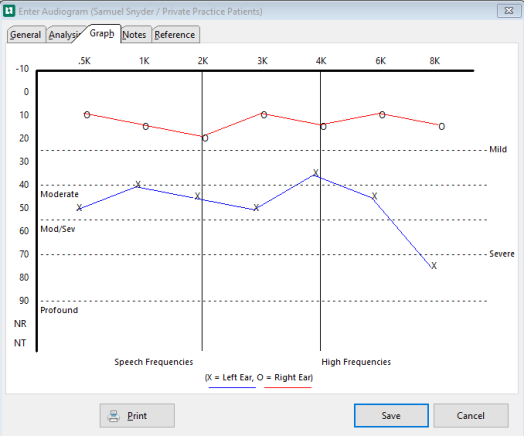
Click the Graph tab to see a graph of the current test. (The graph does not print. You can, however, capture it with a print screen.)
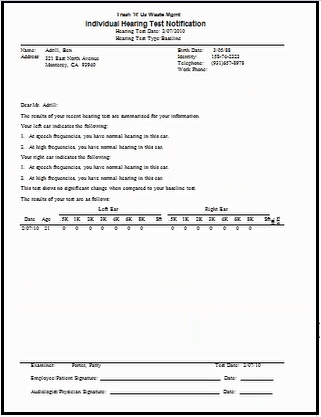
Select Print button to produce Summary Test Form and/or an Employee Notification.
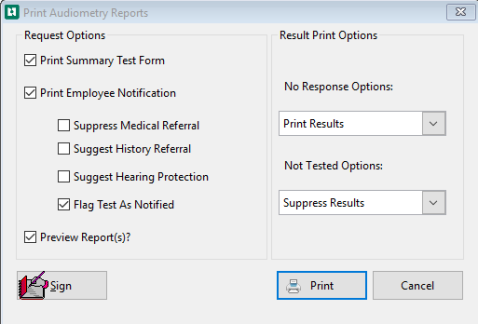
- Check the boxes for the ones you want. You can view these on the screen by checking Preview. If you select more than one form and choose to preview, the first will be displayed in the print previewer. When done, exit by clicking the blue door on the toolbar, and say Yes when asked if you want to cancel the report.
- Providers may select Sign in the lower left corner of the window, to sign both the Summary Test Form and the Individual Hearing Test Notification. This will produce the provider signature on each report. The date of the signature will always be the day the reports were signed, even if the reports are printed at a later date.
- To Print the reports, click OK.
- The reports will then be displayed.
When Print is selected from any of the tabs on the Enter Audiogram window the user has additional options to Fax, Email, or create a PDF. On the top right of the software window the new options will display  . Further information about how to create a PDF for a special report can found at Printing Reports to PDF. How to create an Email or Fax for a special report can be found at Faxing and Emailing Reports.
If the audiometer is set up to allow imports, users will note the import button in the lower part of the window. This function will import and populate one patient record into the Audiogram window
.
-
Select Import
-
Select the file from your default Net Health Employee Health and Occupational Medicine directory (unless you have created a separate directory).
-
Select Open
-
The patient information will populate on the Audiogram record. The patient date will populate the Audiogram window, based on the "Match On" field established in the Audiometry setup window.
-
Select OK when done.
Batch Report Printing
Two specific report types may printed in a batch mode:
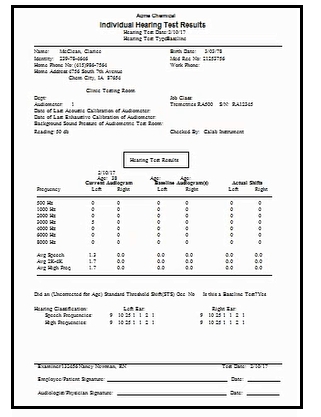
- Individual Hearing Test Results
- Employee Notifications
Batch reporting selections can be found as follows:
From the Reporting menu on the Home Navigation bar, select Employee Health Reporting display the following window:
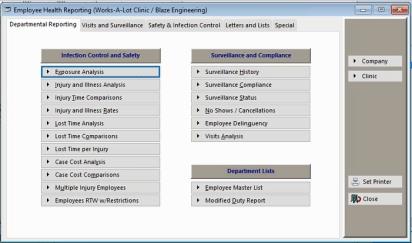
Select the Special tab to display the following window;
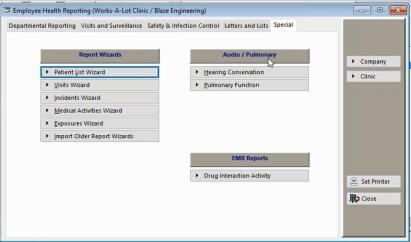
Select Hearing conservation to display the following window:
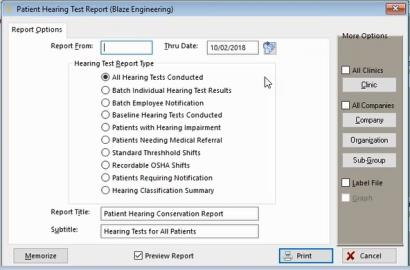
Batch Individual Hearing Test Results
When the Batch Individual Test Results radio button is selected, a second tab will appear called More Options.
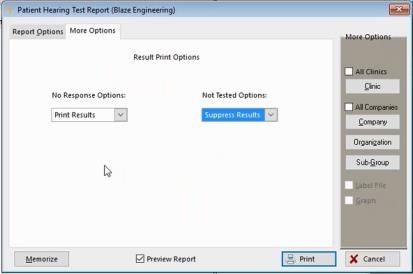
No Response Options:
- Print Results (default option)
- Suppress Results
- Replace with "NR"
Not tested Options:
- Print Results
- Suppress Results (default option)
- Replace with "NT"
Select the filter options to customize your report, like the example below:
Batch Employee Notification
When the Batch Employee Notification radio button is selected, a second tab will appear called More Options.

Flag Test As Notified is checked by default.
Suppress Medical Referral if checked will remove a notice to the patient that this indicates a possible medical problem and the patient should see a hearing specialist.
Suggest Hearing Protection If checked it will include a paragraph telling the patient to wear appropriate hearing protection
No Response Options:
- Print Results (default option)
- Suppress Results
- Replace with "NR"
Not Tested Options:
- Print Results
- Suppress Results (default option)
- Replace with "NT"
Select the filter options to customize your report, this example has all options checked along with providing Print Results for both Response and Tested:
Special Notes for Batch Reporting:
-
Although the Employee Notification populates with selections from the "Print Audiometry Reports" window, the one option that shall not appear is the Suggest History Referral.
-
If the "Flag Test as Notified" option is selected, then the "Employee Notified"check box on the General tab of the Enter Audiogram window will appear checked for every patient/employee selected. On the General tab of the Medical Activity, select the Test Info button to view the Employee Notified check box.
-
When either the "Batch Individual Hearing Test Results" or "Batch Employee Notification" radio button is selected, the Label File and Graph options are not available.
-
While the Individual Hearing Test Results Report accessed from an audiogram medical activity has a signature button, this button will not be available on the Batch Individual Hearing Tests Results Report. However, the Individual Hearing Result Test Report itself will appear exactly the same when printed as a batch as it is when printed form a medical activity, with signature line(s).