How to Print an Encounter Form
If you haven't already done so, please read the Patient Check-In Overview topic before continuing!
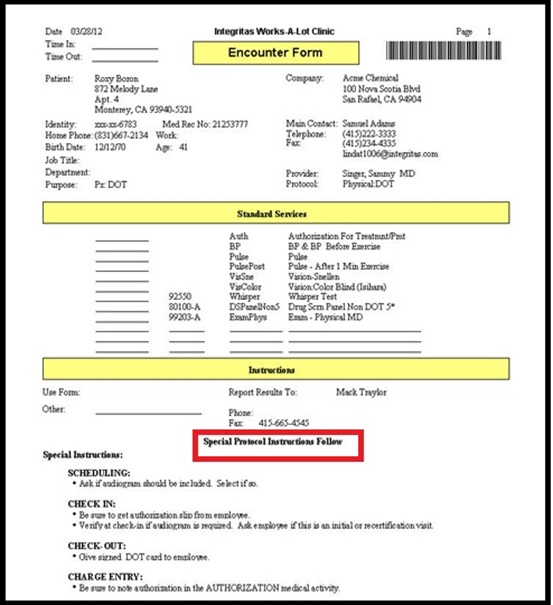
View a Sample Encounter Form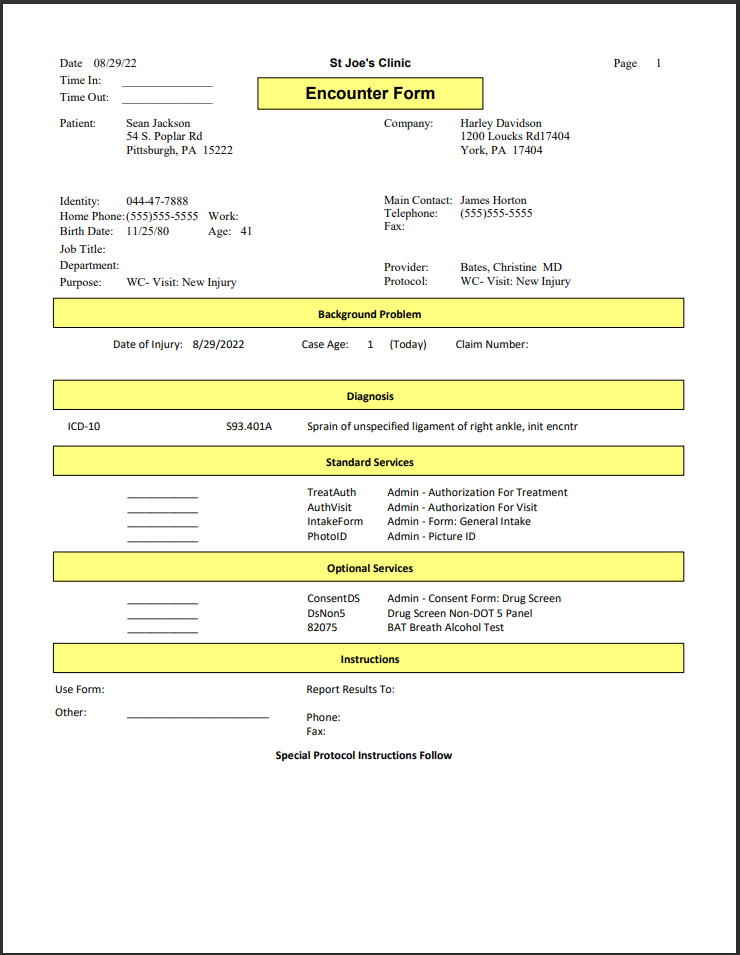
Once you have logged the visit and have the visit record open, you can print the Encounter Form for the visit. Follow these steps:
-
Select Encounter on the right side of the Enter Visit window
-
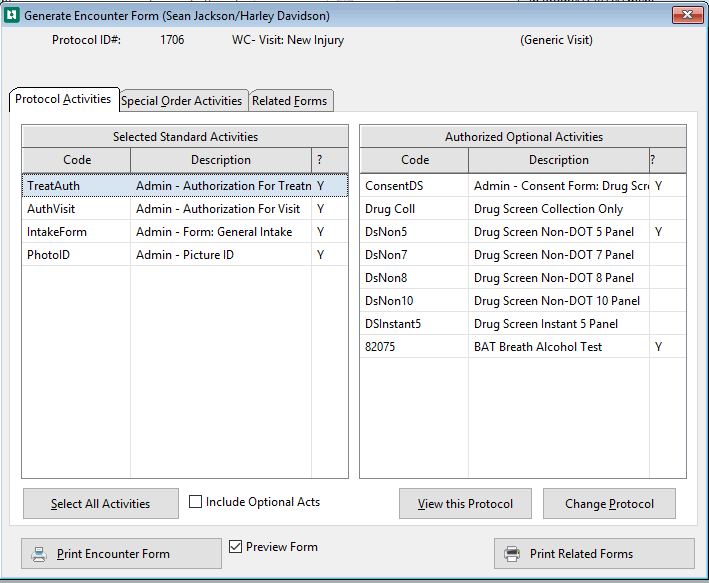
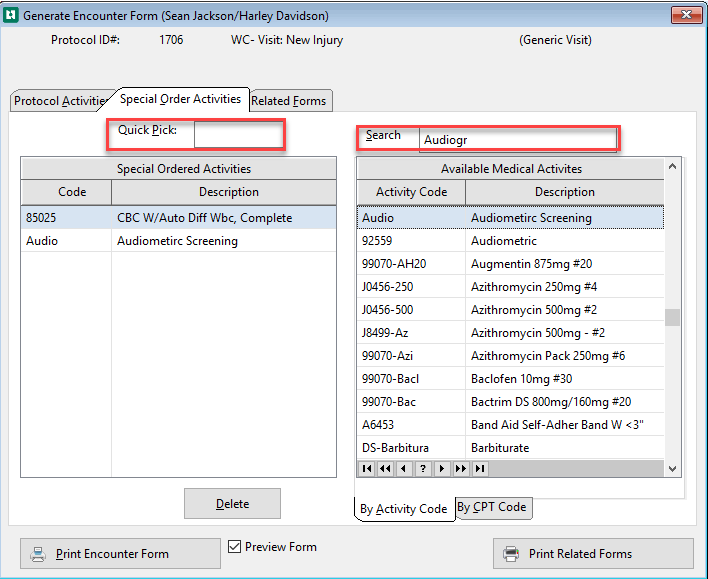
The Generate Encounter Form window opens
-
In the left pane, [Selected Standard Activities], double click the activities that you want to administer during the visit. These will print on the Encounter Form. the program will put a Y (Yes) next to each selected activity.
-
Select all the standard activities that are listed in the window by clicking the Select All Activities button under the list. (The Include Optional Acts checkbox is unchecked by default).
-
If you select an activity by mistake double click that activity again. The Y will disappear, and it will not print on the Encounter Form.
-
When a protocol is set up, a standard activity can be made conditional based on age or sex. If the current patient does not meet the criterion, that activity will not be checked when you click Select All Activities. If you know that it really should be included, you can double-click to select it.
-
-
In the right pane, [Selected Optional Activities], select only the activities that you want to administer during this visit. The software will put a Y (Yes) next to each selected activity. These will print on the Encounter Form.
-
Select any optional activities that should be included by double-clicking that activity. You will know which activities to select by reading the Protocol Instructions Every protocol, generic and company specific, includes instructions specific to that protocol. They should be organized by work station: Scheduling, Check-In, Clinical, Check-out, etc. and/or the Appointment Note The appointment note is entered when a visit is scheduled. It contains information gathered by the scheduler that will be needed at check-in. .
-
If you select an activity by mistake double click that activity again. The Y will disappear, and it will not print on the Encounter Form.
-
-
If an activity has been ordered for this visit which is not a standard or optional activity on the protocol, click the Special Order Activities tab. Select any additional activities from the lookup list on the right. If the Activity Code or CPT Code is known enter it in the Quick Pick field.
-
If your organization is using User Defined Encounter Forms, you will have a tab labeled RELATED FORMS. You can click this tab to see any forms associated with this visit category. By default, these forms will print automatically when you print the Encounter Form.
-
Select Print Encounter Form
-
If you want to by-pass the Print Preview, uncheck the Preview this form? box.
-
From the Print Preview function, click the printer icon
 to print or the exit icon
 to cancel the document.
-
-
If your clinic has been set up to print clinical labels, a message beside the Print Encounter Form button will indicate the number. They will print at this time. Labels print to a separate printer which is designated on the Printers tab of the [Enter Clinic] window.

-
In addition to the Encounter Form, Related PDF forms will print.
-
Back on the Enter Visit window
-
Leave the visit status Pending Results.
-
Select Save
-
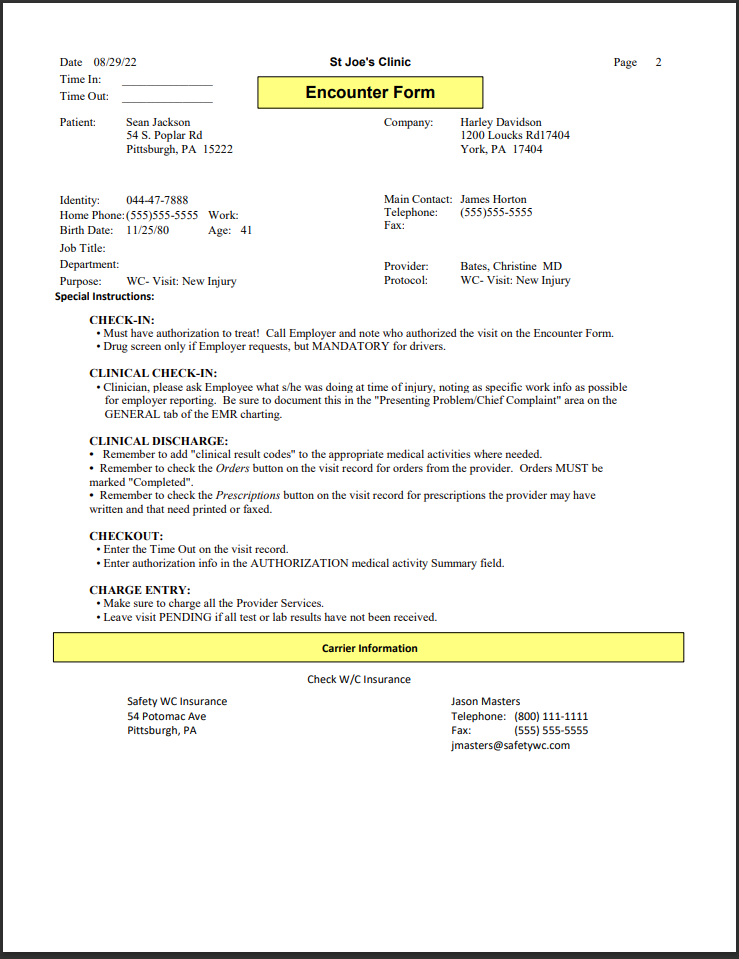
When an Encounter Form has a long set of instructions, the print function has to start those instructions on the second page. Sometimes users think it is just a single page form and do not see the subsequent printed pages.
The Encounter Form print includes a subheading so the users can tell when the instructions will continue to more than one page. A subheading Special Protocol Instructions Follow will print at the beginning of this section if there are special instructions. The separate subheading There are no Special Protocol Instructions will print when there are no special protocol instructions.
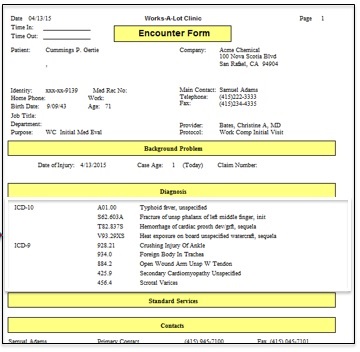
The Encounter Form Report from the Visit and from the Appointment prints all ICD codes entered on the incident. Group by the ICD version (ICD-9 / ICD1-0). If ICD-10 codes are present, The software will list the ICD-10s prior to the ICD-9s. The software will also display a label on the first ICD-9/ICD-10 printed to distinguish between ICD-9s and ICD-10s (see below):