Documenting Spirometry Testing
If you haven't already done so, please read Clinical Results Overview, Patient Check-Out Overview, Visit Activities Overview, and Set Up Tigger Entyry for Spirometric Testing before continuing! Also, read How to Change Spirometry System Parameters.
Summary
This topic addresses how to document the full details of an Spirogram. the program will automatically calculate when there has been a standard threshold shift or an OSHA recordable shift. The Spirogram (or Pulmonary Function Test) medical activity requires special setup to enable the entry of detailed results.
Steps to Document a Spirogram
-
Reopen the visit record.
To reopen a visit from the Home Launch Pad:
-
Click Visits by Employee on the CLINIC tab.
-
If you did not just schedule a follow-up appointment, search for and select the Employee.
If you did just scheduled an appointment, the same employee will be displayed on the window Select Employee. Click OK.
To reopen a visit from the Appointment Calendar.
-
Click Today's Scheduling.
-
Find the patient and double-click to open the visit.
- OR -
-
Find the patient on the calendar.
-
Double click to open the visit
-
-
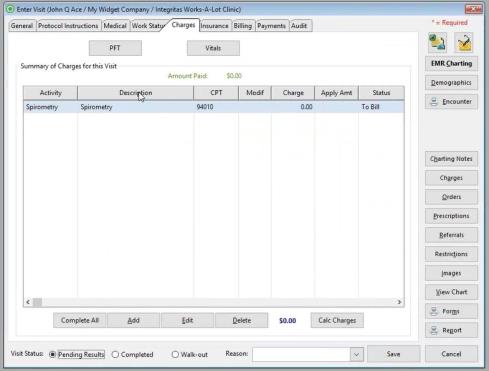
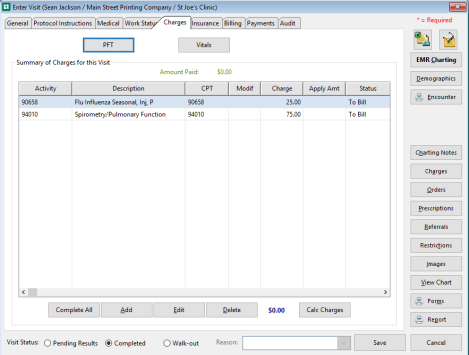
Click the Charges tab of the [Enter Visit] screen.
-
Click the PFT Button at the top of the window.
-
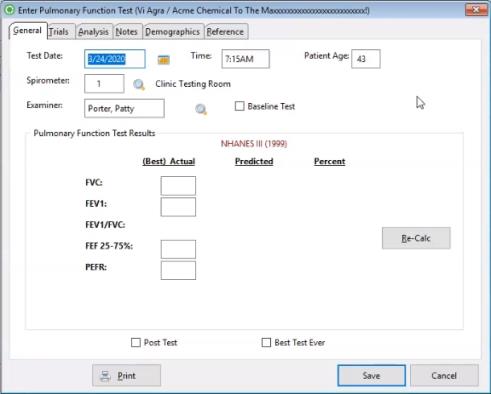
The General tab of the Enter Pulmonary Function Test window will display.
-
Confirm the Date and Time, and enter the patient Age. For Import functions, the date must match the target import file.
-
Click the magnifying glass icon, beside the Spirometer field and select the one needed for this test. Once you select your device, if you are using a customizable file definition, make sure your device is using the correct format that matches your import file layout exactly. See How to Change Spirometry System Parameters.
-
Click the magnifying glass icon beside the Examiner field, highlight the correct clinician, and click Select.
-
Check the Baseline check box if appropriate. The default is unchecked. If you are importing a record and it is flagged as a baseline record, it will import with the Baseline check box already checked.
-
Enter the responses results for the best test.
-
You must select whether you want a Pre-Test or a Post-Test. Click the checkbox to select a Post-Test, leave it blank to select a Pre-Test.
- If an Import file is available, the button will display at the bottom left of the window. To import a file, click the Import button. This function will import and populate the patient record into data fields across multiple tabs of the Enter Pulmonary Function Test window. Also make sure the Data Import Option is enabled.
NOTE: If the device is the Benson Cloud, the data remains in tact unless there are changes to height, weight, age, etc. The Re-calc function will change the values of the import record.
NOTE: Using customizable file definitions:
In order to attach a specific customized file format to a particular device, see How to Change Spirometry System Parameters. -
Check the Post Shift Test check boxes if appropriate.
-
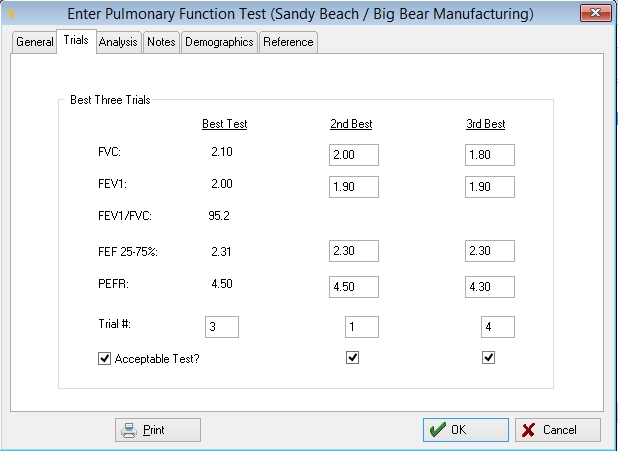
Click the TRIALS tab and enter the information for the second and third best tests, if available.
-
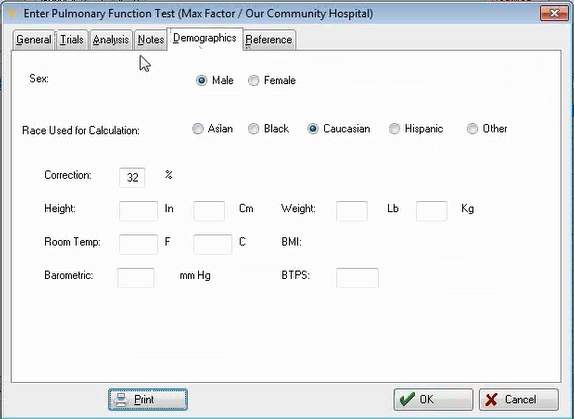
Click the DEMOGRAPHICS tab. Fill in any demographics information that the program was not able to pull from the patient record. Enter the Room Temperature and Barometric Pressure at the time of the test.
-
Click the REFERENCE tab and indicate the Predicted Values Method for the program to use.

-
Update the Equipment Calibration information, if needed. The software will display the information currently carried in the Spirometer record, so it only needs to be entered if it has changed.
-
On the GENERAL tab, click the Re-Calc button.
-
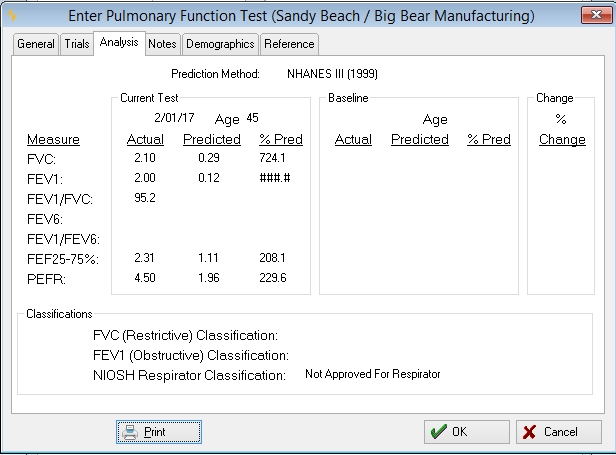
Click the ANALYSIS tab to see the results of this test compared to a previous base line, if one has been entered.
-
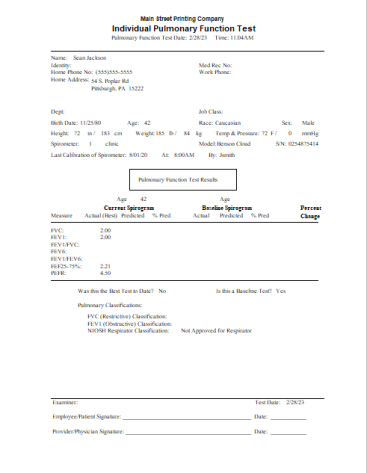
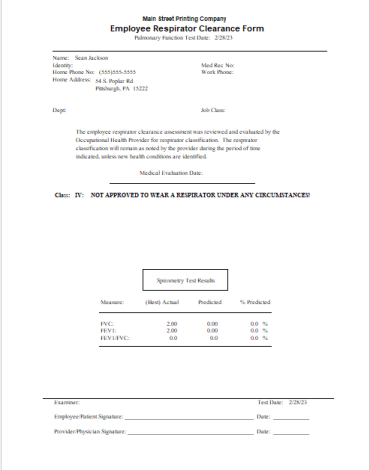
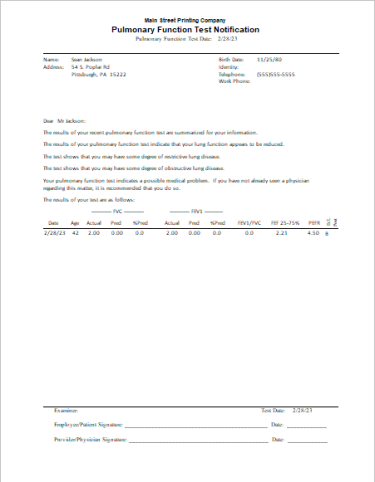
Three documents can be printed by clicking the Print button.
-
The first is a Summary Test Form.
-
The second a Respirator Clearance Form.
-
The third is an Employee Notification.
-
Check the boxes for the ones you want. You can view these on the screen by checking Preview. If you select more than one form and choose to preview, the first will be displayed in the print previewer. When done, exit by clicking the blue door on the toolbar, and say Yes when asked if you want to cancel the report. The next report will then be displayed.
-
The Print button has additional options to Fax, Email, or create a PDF. When the Print button is selected, the top right of the software window will display the new options. Further information about how to create a PDF for a special report can found at Printing Reports to PDF. Further information about how to create an Email or Fax for a special report can be found at Faxing and Emailing Reports.
-
-
Click OK when done.
Multiple Spirometry Test Results Per Employee, Per Day
The software now has the ability to accept a spirometry Pre and Post test result; the system is able to support two results of the same test for the same patient / visit.
The process of importing in Spirometry processing forces the system to always import the Pre-test first if it is coded in a way that if Pre and Post Spirometry results are included in the file, If the Pre-test already exists within the database (it may have been imported previously or manually entered) then the system will import the Post-test. If the second test result needs to be imported into the application, users must have a second Medical Activity for Spirometry which is attached to that test result.
Enter Visit window, Results or Charges tab, PFT button
Select PFT to open the Enter Pulmonary Function Test window. if there are multiple test results for the visit
To use the Import function from PFT sub-tab, see procedures above for the Pulmonary Function window.
Enter Pulmonary Function Test window

Enter_Pulmonary_Function_Test
Pulmonary Function Test Notification Report

View Patient Chart window, Clinical Results tab, Pulmonary Function sub-tab

View_Patient_Chart
The View Patient Chart window, under the Clinical Results tab, and the Pulmonary Function sub-tab, displays whether or not the test is "Post". If the actual test is set as a Post Test, the system will display a "Yes" in the column under the heading Post.
|
|
If you attempt to enter a second Spirometry test in one day, the software might display an error message when you try to save the detailed results. To avoid this, check the Post Shift checkbox at the bottom of the window, then click Save again. |