Set Up Prescription Formatting Templates
|
|
To work with Prescription Formatting Templates, your user code must first allowaccess to the EMR, and second, have you set up as a Prescribing Provider. If you do not see the buttons for these tables on the Setup and Administration menu, then you do not have access. |
-
On the Home Nav Bar, click Setup/Admin.
-
Click EMR Setup.
-
Click Prescription Templates.
-
On the [Prescription Print Format Templates] window, click Add to create a new template, or highlight an existing one and click Change. Either action will display the [Prescription Template] window.

-
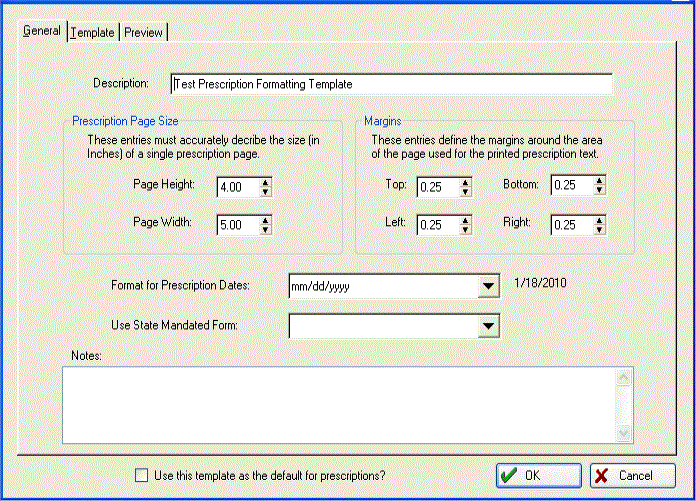
Enter the Descriptionfor the template (ex. "XYZ Pharmacy".)
-
Enter the dimensions for the Page Size and Margins.
-
Click the drop-down arrow beside Format for Prescription Dates, and make your selection. Today's date will be displayed beside this field in the currently selected format.
-
Optionally, click the drop-down arrow beside Use State Mandated Form and select a state.
-
Not implemented at time of writing. It will enter default page dimensions and margins along with the required layout for that state.
-
-
Net Health Employee Health and Occupational Medicine has a built in default prescription format. To make this your default prescription template, see the PRESCRIPTIONS tab of EMR Parameters. (Use this template as the default for prescriptions? is currently not used.)
-
If you wish, make notes about when, why, etc this template was created.
-
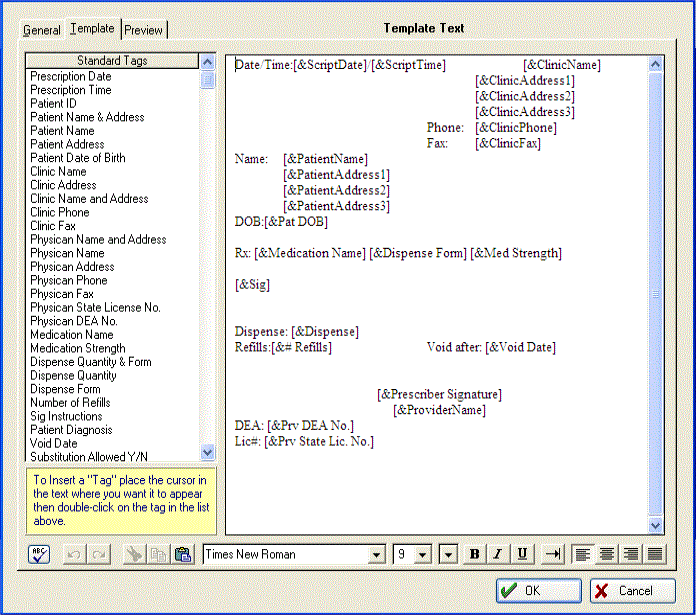
Click the TEMPLATE tab. The actual form, with details of what information you want Net Health Employee Health and Occupational Medicine to place where, is designed on this tab. Information entered here consists of two types. Literal items which are printed on the form as entered. An example is that label "Name:". The second type is tags which indicate where Net Health Employee Health and Occupational Medicine should insert information from the database. Beside the "Name:" label you would likely have [&PatientName]. Net Health Employee Health and Occupational Medicine would then enter the patient's name at that location. Tags always consist of a field name preceded by an ambersand (&), surrounded by a pair of square brackets ([ ]).

-
Enter a literal text item my moving the cursor to the desired location and just typing.
-
Enter a tag by placing the cursor at the desired location, locating the tag on the list of Standard Tags on the left, and double clicking it. (If you prefer typing, you can also just type it in as long as it is in the correct format.)
-
Right click to display a pop-up a menu with standard Windows options to Undo, Copy, Cut, and Paste.
-
The menu also includes an option to Insert Object. When you do this, you are offered a long list of object types. It is unlikely that you will want to insert anything other than a pre-existing bitmap image with, perhaps, your logo.
-
Locate the cursor where you want to insert the object.
-
Right click to display the pop-up menu, then click Insert Object to display the [Insert Object] window.
-
Click the radio button Create from file.
-
Click Browse, then navigate to the folder with the image file and select it.
-
Click OK to insert the image.
-
-
Rich text formatting can be applied to elements of the template, including tags.
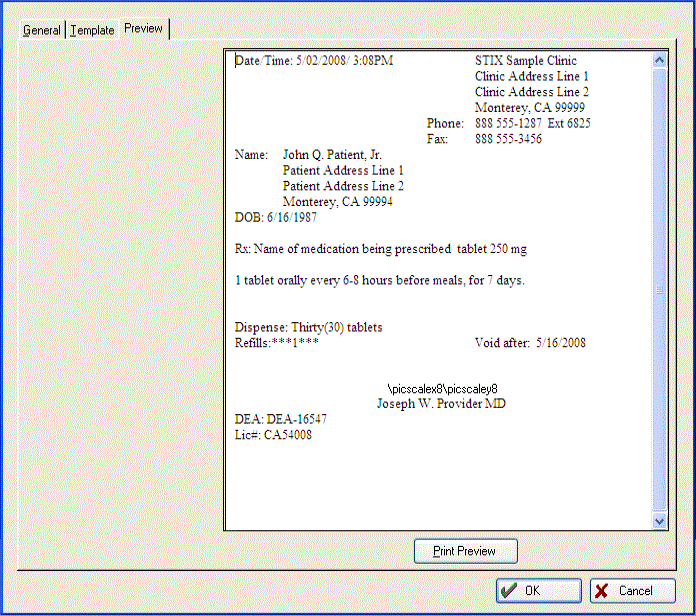
- At any time, click the PREVIEW tab to see sample data displayed in your format.
-
In order for the Patient Allergies to print, on the EMR Parameters, Prescription tag, users must select a Script Template. If a prescription template is utilized, then the Patient current Allergies (that have not expired as of the current date) will print wherever the [&Allergy] tag is found on the template. If the patient has multiple allergies a comma will be used to separate each Allergy. If the patient has the No known Allergies (NKA or NKDA), then the Allergy tag will print: "The patient has No Known Allergies as of MM/DD/YYYY".

- To print the Diagnosis Code and Description on the prescription
- Ensure the "Include Diagnosis Description on Prescriptions" checkbox is checked
- Include the Diagnosis code and Description fields as part of your default prescription template.
- Make sure the patient problem is associated with the prescription.
-
Click OK when done.