How to Enter a Family Guarantor
If you haven't already done so, please read the How to Add Patient Insurance topic before continuing!
Summary
A Family Guarantor record carriers insurance information for the insured member of a family. When other family members who are covered by the same policy are entered you can associate them with the existing family guarantor record thereby automatically filling in the needed insurance information.
Steps to Add a Family Guarantor
A Family Guarantor is added from the Enter Patient Billing window when insurance information is entered for the insured subscriber. This is done from the INSURANCE tab of the patient demographics record.
-
From the Demographics Enter Patient window
-
Select Insurance tab
-
Select Add to begin entering the patient's insurance information
-
The Enter Patient Billing (patient name) window opens
-
From the Insurance tab
-
Select the magnifying glass next to Family Guarantor
-
The Select Guarantor Account window opens
-
If the guarantor already exists highlight them and click select
-
-
If not listed select Add
-
The Enter Guarantor Account window opens
-
Enter a unique code for Family Guarantor ID
-
The program will fill in the remaining fields on this tab from the patient demographics record.
-
Change the Account or Head of Household Name section to be the Guarantor's information
-
If the address is different for this guarantor change it
-
Enter E-Mail address if provided
-
On the Statistics section
-
Enter the Guarantor's birthday and Sex

-
-
Select the Insurance tab
-
Complete this section with Guarantor's Insurance information

-
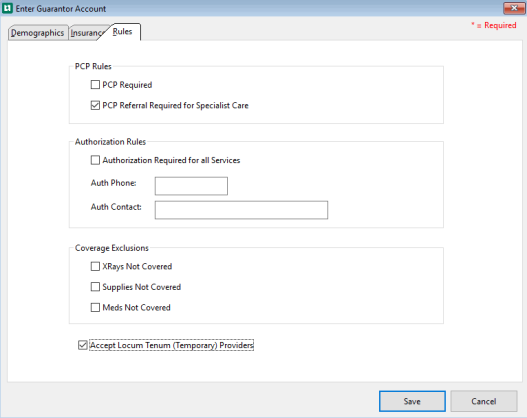
Select Rules tab. These fields are for reference only: the program does not used them in any way.
-
PCP Rules - This section defines of a PCP is needed and if a Specialist is needed does the patient need a referral from their Primary Care doctor.
-
PCP Required
-
PCP Referral Required for Specialist Care
-
-
Authorization Rules - Does the patient need authorization for treatment
-
Check Authorization Required for all Services if yes
-
Enter Auth Phone
-
Enter Auth Contact
-
-
Coverage Exclusions - What services are not covered on this plan. Check all that apply.
-
XRays Not Covered
-
Supplies Not Covered
-
Meds Not Covered
-
-
Check the Accept Locum Tenum (Temporary) Provider if they are accepted.
-
Select Save