Finding a Scheduled Visit
On the appointment calendar:
-
Look in the Provider column at the designated time to find the appointment.
-
Highlight the appointment.
-
IF there is an asterisk ("*") beside the visit category in the Appointment Details pane on the right of the calender, double-click the appointment to read the Appointment Note. Then click OK.
-
Right-click on the appointment for this patient to pull up a menu.
-
Click on Log a Visit on the pop-up menu.
-
The software will create and open the visit record.
-
Follow instructions for the specific type of visit.
If you cannot find the appointment by looking at the calendar:
-
Select Check-in a Patient on the right pane of the Appointment Calendar
-
Select Search the Schedule.
-
The Select Patient window opens
-
Enter patient's name
-
A second Select Patient (Across All Organizations) window opens with the patient on the left
-
If the patient has more than one company assigned to them highlight the company associated with this visit.
-
Click Select
-
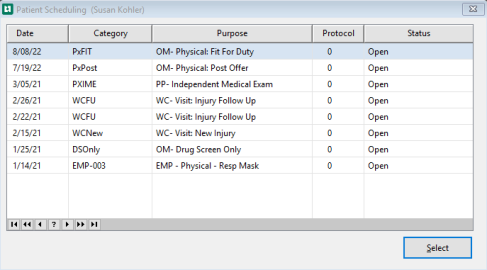
Patient Scheduling (patient name) window opens
-
Highlight the appointment
-
Click Select
-
The Enter Visit window opens
-
The Visit Type will be selected from the Appointment
-
Select the Means of Arrival from the dropdown if used by your organization
-
Enter the Arrival Time
-
Visit Date, Start Time, Category, Purpose, Type, and Provider will be auto-filled from the Appointment
-
Select the Protocol Instructions tab and read the instructions for Check-In.
-
Select Demographics and confirm the patients information.
-
Then select Save if changes were needed or Cancel
-
-
If a payment is to be collected, record it on the Payment tab.
-
Select Encounter from the right pane of the Enter Visit window and select services, and print encounter form.
- If Appointment Notes were added on the Appointment an Appointment Notes button will display on the bottom of the General tab of the Enter Visit window. Select it to view the Appointment Notes or Reservation Notes for this Visit.
-
Select Save to log the visit.