If you haven't already done so, please read Fee Schedules Overview before proceeding.
Summary
If you are a provider that offers Workers Comp or Private Practice services to employers in more than one state, it is likely that each state will have a different fee schedule or maximum reimbursement amount. The program will use the appropriate standard fee schedule for each type of billing for your primary state. You can create an additional state fee schedule for entry of fees for the second state. When an additional state fee schedule is entered, you indicate whether it is for Workers' Comp or Private Practice. If you perform both categories of work in the second state, you will need to add a fee schedule for each.
You do not need to tell the software to use the additional state fee schedule. If one has been entered, it will be used.
If you only treat patients from one state, you do not need to use this.
What Do You Want To Do?
Get Ready
-
Copy a state fee schedule to a different state, or import from the standard fee schedule
-
Which Fee Will Be Used?
Enter Fee Schedules
-
Steps to set up a state fee schedule
-
On the Home Nav Bar, click Setup/Admin.
-
Click Billing Setup.
-
Click the State Fee Schedules button.
-
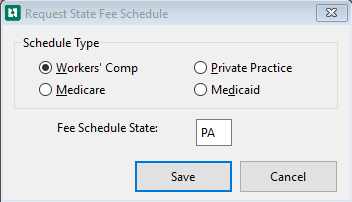
The Request State Fee Schedule window opens
-
For Schedule Type indicate whether this is a Workers' Comp or Private Practice fee schedule.
-
Type in the state abbreviation
-
Click Save to display the State Workers' Comp Fee Schedule - (state) window.
-
-
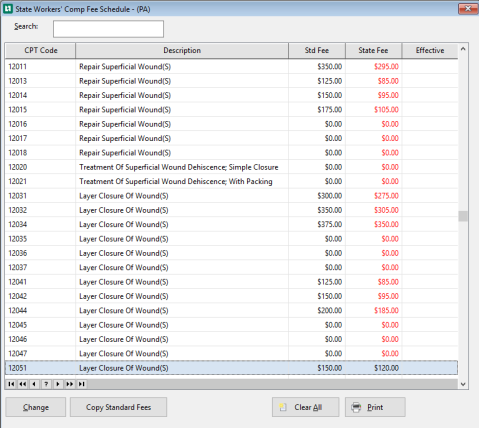
Optionally, click Copy Standard Fees to copy all fees from the standard Workers' Comp fee schedule into this state fee schedule.
-
Optionally, click Clear All to remove all state fees.
-
To add fees specific to this state, double click the first item on the list, or highlight any item and click Change.
-
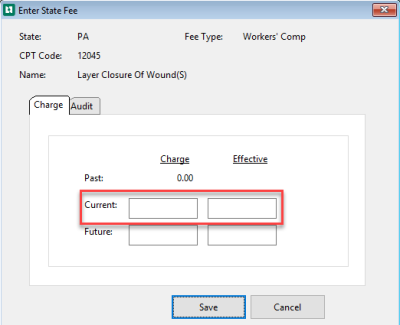
If this is a new activity or if the fee is to go into effect immediately, enter it in Current Charge.
- OR -
If this fee should become effective at a future date, enter the fee in the Future Fee field, and the effective date in the Future Effective field. the program will automatically start using the future fee for visits entered on and after that date. At some point after the effective date you will need to "roll" all future fees into the Current Fee field and clear out the Future Fee for the next update. Read Entering Fees to Become Effective at a Later Date to learn more.
-
Click Save and you will be returned to the State Fee Schedule window.
-
Repeat steps 4 through 6 for each fee, to enter the fees for all the items on your list.
-
Click red X to close the window.
-
-
Print the fee schedule
To print the fee schedule, click the Print button in the lower right side of the [State Fee Schedule] window.
-
Entering fee schedules to become effective at a later date