How to Set Up Provider Rapid Charting
For a list of terms specific to the EMR, see the EMR Glossary.
Summary
Rapid Charts allow you to create highly automated Charting Templates by aggregating a number of Template Wizards to be run as a group. Multiple Rapid Charts can be associated with a single Template. There are several types of Rapid Charts:
-
HPI Set: Rapid Charts of this type allows you to select Wizards that are associated with Template Elements on the HPI tab.
-
History Set: Rapid Charts of this type allows you to select Wizards that are associated with Template Elements on the PMH tab.
-
ROS Set: Rapid Charts of this type allows you to select Wizards that are associated with Template Elements on the ROS tab.
-
Exam Set: Rapid Charts of this type allows you to select Wizards that are associated with Template Elements on the EXAM tab and the INSTRUCTIONS tab.
-
Order Set: Rapid Charts of this type can include Wizards associated with all types of orders, including medications, as well as RESULTS Wizards.
-
Full Charting Note Set: This supports complete documentation of fairly standard problems. It can include any type of Wizard as well as medications.
A number of predefined Rapid Charts come with your system. You might want to study a few of them to get a better idea of how they work before you try creating your own.
What Do You Want To Do?
-
Set up a Rapid Chart
-
On the Home Nav Bar, click Setup/Admin.
-
Click EMR Setup.
-
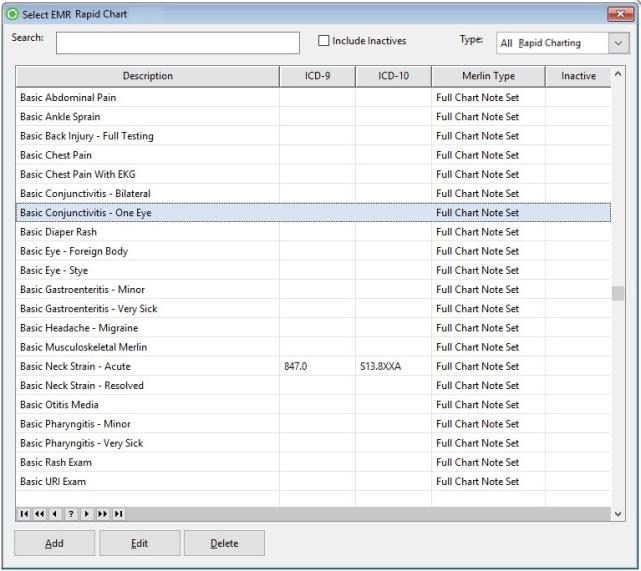
Click EMR Charting Rapid Charts to display a list of existing Rapid Charts on the [Select EMR Charting Rapid Chart] window. By default, this window lists All Rapid Charts, but you can limit it to just Exam Set or just Order Set Rapid Charts. To do so, click the Type drop-down box in the upper right and select the group you want.
-
Click the Add button to create a new Rapid Chart, or search for and select an existing Rapid Chart to work with and click Change.
-
On the [Set Up EMR Charting Rapid Chart] window, you may optionally start by copying one or more existing Rapid Charts:
-
Click the Copy Another Rapid Chart button in the lower left of the window.
-
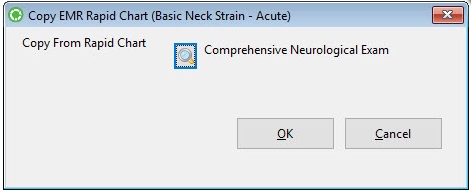
On the [Select EMR Charting Rapid Chart] window, search for and select the Rapid Chart to copy.
-
On the [Copy EMR Rapid Chart] window, click OK. All wizards on the selected Rapid Chart will be copied into this Rapid Chart. The Type of the Rapid Chart will be changed to the Type of the copied Rapid Chart.
-
-
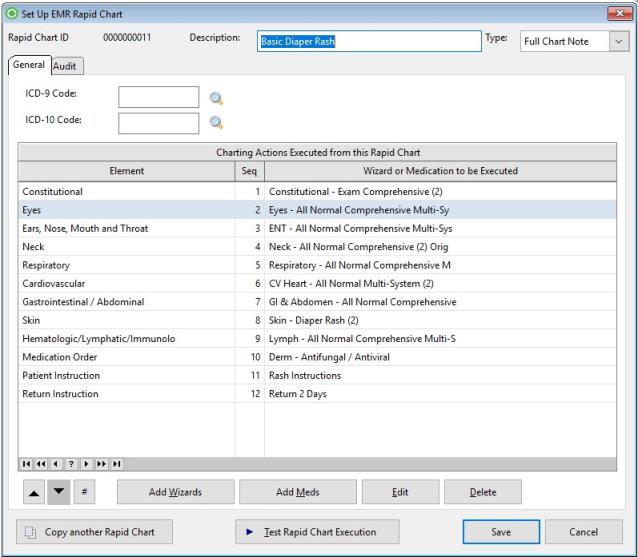
If not already set correctly, select the type of Rapid Chart in the upper right of the window by clicking the drop-down arrow beside the Type field. (If you copied more than one Rapid Chart, and they were of different Types, this field will be set to the Type of the last Rapid Chart copied.)
-
Optionally, select an ICD code to be added to the visit when this Rapid Chart is executed. Click the table icon
 beside the field to display the [Select ICD Code] window. Search for and select the diagnostic code you want. This will typically be done only with Full Charting Set Rapid Charts.
 - Wizards are sequenced to the left with the numbering scheme under the "Seq" column. Up/Down arrows at the bottom left of the window change the relative position of the wizard that is highlighted. The "#" symbol will resort the sequence if it gets out of order.
-
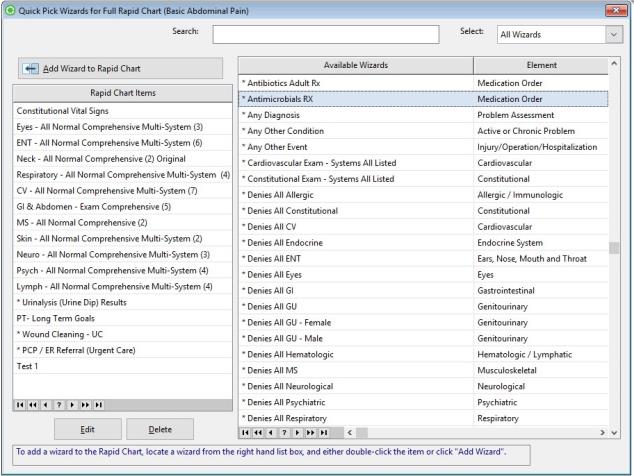
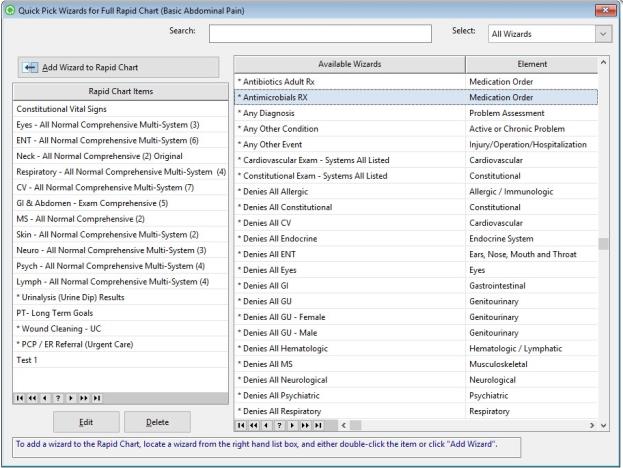
To add Wizards to this Rapid Chart, click the Add Wizards button. This will display the [Quick Pick Wizards] window.
-
This window has a split screen display. The pane on the left, [Rapid Chart Items], shows all wizards selected for this Rapid Chart. The pane on the right, [Available Wizards], shows the list of Wizards you can select for this Rapid Chart, along with the Template Element each wizard is associated with.
-
By default, [Available Wizards] displays displays only wizards from that tab.
-
For some Wizard sets you can filter the list of Wizards displayed by clicking the drop-down arrow beside Type in the upper right of the window. Exam Set Rapid Charts allow you to choose to display Exam and Results Wizards.
-
An Order Set Rapid Chart allows you to display Med Orders Only, Instructions 0nly, or Other Orders Only.
-
Full Charting Note Set Rapid Charts allow you to display all wizards or just Wizards from a single tab.
-
-
Search for Wizards you want in the right pane. When you find one, highlight it, then either double-click or click the Add Wizard to Rapid Chart button.
-
To remove a Wizard from this Rapid Chart, highlight it in the left pane, then click Delete.
-
Click Done to exit back to the [Set Up EMR Charting Rapid Chart] window.
-
Optionally, click the Add Meds button to add medications to this Rapid Chart. This will take you to the [Quick Pick Medications] window. This works the same as the [Quick Pick Wizards] window, with two differences:
-
The right pane shows medications.
-
You can limit the medications shown by clicking the table icon
beside Medications Class in the upper right. This will display the [Select Medication Class] window. When you select a medication class, only meds in that class will be displayed in the right pane.
-
-
After selecting Wizards for the Rapid Chart, you can see how the Rapid Chart will work by clicking the Test Rapid Chart Execution button. The order in which Rapid Charts will execute is based on the Charting Template tab and Template Element they are associated with. Rapid Charts will be run for tabs starting on the left, and working right. On each tab, they will run in the order in which the Template Elements are displayed.
-
If you decide not to use a Rapid Chart any more you have two options. The recommended method is to check the Inactive box on the [Set Up EMR Charting Rapid Chart] window. When you check the box, you will also be able to enter an As Of date beside it. Doing this will remove the Rapid Chart from all selection lists available to users, but it will still be available for reference or updating. If you want to resume using it at a later date, simply uncheck Inactive.
The alternative is to highlight the Rapid Chart on the [Select EMR Charting Rapid Chart] window, then click Delete. This will permanently remove the Rapid Chart from the list. If this Rapid Chart is currently associated with a Charting Template, you will not be allowed to delete it until it is removed from all Templates.
-
Click OK when you are finished working with this Rapid Chart.
Inactivate a Rapid Chart
Users may inactivate a Rapid Chart by checking the check box located on the Audit tab. A date is required as well.
-
-
Associate a Rapid Chart with a Charting Template
Rapid Charts are associated with templates as part of template setup.
-
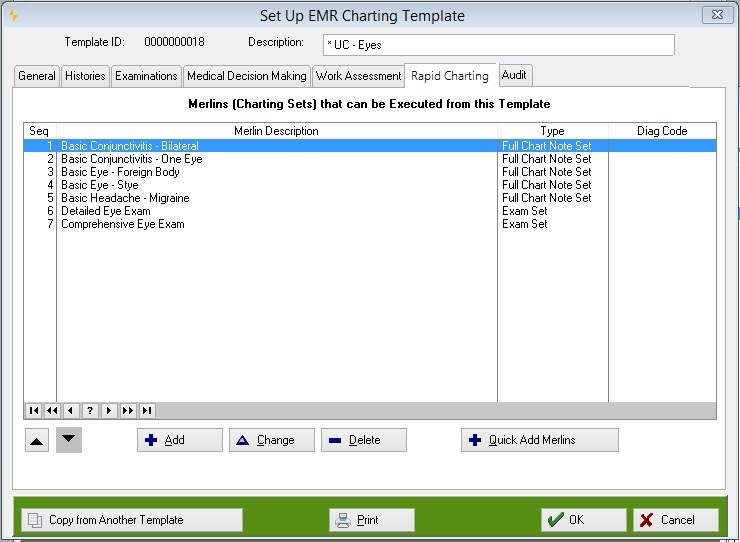
On the [Set Up Charting Template] window, click the Rapid Chart tab.
-
Click Quick Add Rapid Charts to display the [Quick Pick Rapid Chart for Template] window.
-
This window has a split screen display. The pane on the left, [Template Rapid Charts], shows all Rapid Charts selected for this Template. The pane on the right, [Available Rapid Charts], shows the list of Rapid Charts you can select for this Template, along with the ICD-9 code associated with each Rapid Chart, if any.
-
By default, all Rapid Charts are displayed. You can change the list of Rapid Charts displayed by clicking the drop-down arrow beside Type in the upper right of the window. This will drop down a box allowing you to display Exam Set, Order Set, or Full Charting Set Rapid Charts.
-
Search for Rapid Charts you want in the right pane. When you find one, highlight it, then either double-click or click the Add Rapid Chart to Template button in the upper left of the window.
-
To remove a Rapid Chart from this Template, highlight it in the left pane, then click Delete.
-