Manager Portal Parameters
Getting Started
NOTE: This setup will only work for INTERNAL companies
Locate your Admin.exe application that shipped with your Net Health Employee Health and Occupational Medicine software.
Start the application, be sure to login with the Net Health Employee Health and Occupational Medicine ADMIN user.
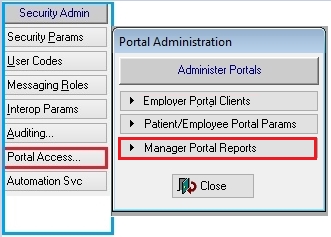
Once in the System Administrator program, click Portal Access then Manager Portal Clients to open the Manager Portal Parameters window.
Adding Clients
You may add Client Access privileges by clicking on the Manager Portal Clients button located on the Portal Access NAV bar. This will display a browse window listing any existing clients that are configured.
The following window will display:
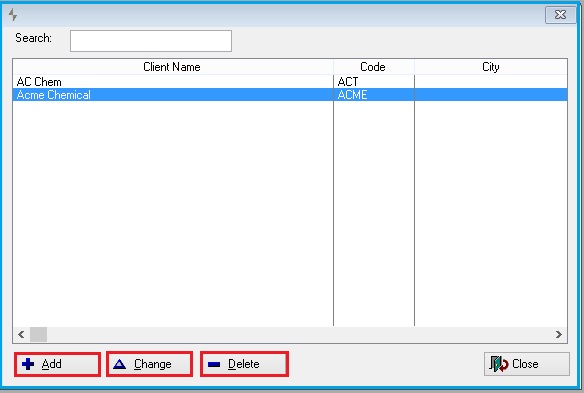
This screen allows users to Add, Change, or Delete Manager Portal Clients. From here, it is recommended you add a Manager client. If you have yet to determine the clients you wish to provide access to, for the purpose of installation you can simply add a test client that will be removed at a later time. The addition and removal of Clients is only accessible from within the Admin.exe program.
For the purpose of this document, click on the Add button at the bottom to add a Client record. The following window will display:
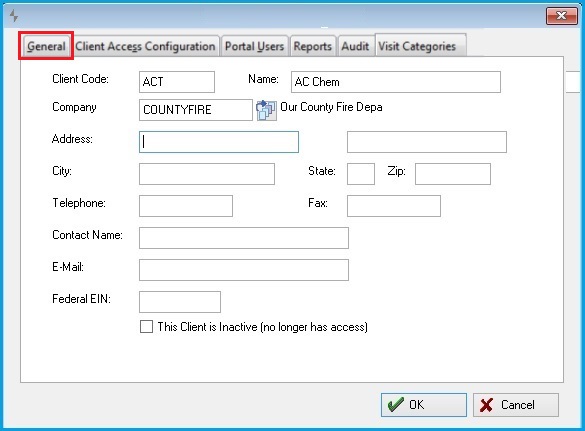
Fill in the Client Information as available on the General tab of the window. The Client Code field will be required by your Clients to log in. When you choose a code for a client you may want to select something that is easy for them to remember.
Users may click on the Company table look up to assist in choosing an (internal) company. Note, only one company at a time may be selected.
Client Access Configuration tab:
Next, click the Client Access Configuration tab and the following window will display:
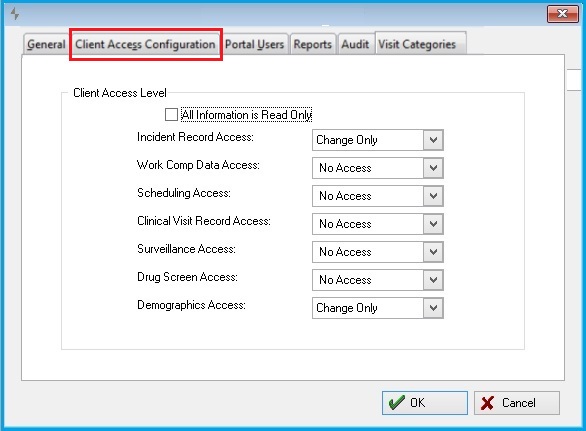
On this tab Net Health Employee Health and Occupational Medicine Users can define access for a remote employer as a whole. While management of individual remote employer accounts within a company will be the responsibility of a "Portal Administrator", users within that company will have their permissions constrained by this company wide configuration. As an example, If a remote employer is set up to have "No Access" to Incident Information, no user within that company will have access to incident information.
This tab can also be used to select the individual client access rights. Look over the allowable access levels supplied. This is where some decisions need to be made about your clients and what information you wish to provide to them.
The access levels provided for the Client are to be considered a default set of maximum rights to be passed down to the individual user records. If a user already exists, and has higher access levels then what is defined for the overall client, the application will use the appropriate Client Access Level as an override when the user logs in. These settings will also be considered the access rights given to the Client Admin.
NOTE: The selected access levels are considered global at the Client level and will work in concert with individual access rights in the following manner: Which ever access is more restrictive between the global client rights and the individual user rights will take precedent.
This screen allows users to Add or Change Manager Portal Users access rights at the "Client" level.
Users may select the "All Information is Read Only" check box to quickly assign Read Only capabilities to this Portal Client.
To separate access, users may select the access level by category and assign capabilities by using the drop down menu on each.
Click OK.
Adding Users
Portal Users tab:
Next, click the Portal User tab and the following window will display:
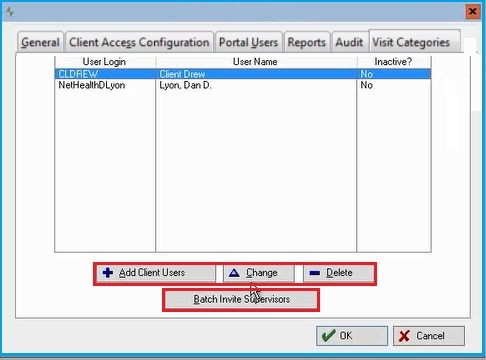
This screen allows two functions:
- To Add, Change, or Delete individual Manager Portal Users.
- To Add at one time a group (batch) of Manager Portal Users. This particular button only appears if the Client is attached to an Inside Company.
Users tab - Individual Managers
Existing users may be selected from the list. However, for the purpose of this document, click on the Add button at the bottom to add a Portal User record. The following window will display:
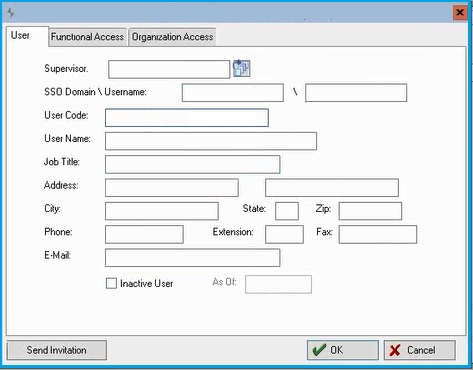
This window is used to add, change, or delete one user at a time; in this case a single Manager or Supervisor. To add this user, all of the necessary data should be entered in the form. Once all of the relevant fields are entered, select the Send Invitation button at the bottom left to invite this particular Manager or Supervisor.
NOTE: Once User Codes are set up and invitations sent, the user codes should not be changed. Routine user administration should be completed through the portal only.
The check box at the bottom of the window is used to Inactivate an existing user. Additionally, for existing users, information may be changed and saved by clicking OK.
To change individual user access capabilities, users may select the Functional Access tab and enter choices in same way the Client Access Configuration tab worked above.
Users may select the "All Information is Read Only" check box to quickly assign Read Only capabilities to this Portal Client.
To separate access, users may select the access level by category and assign capabilities by using the drop down menu on each.
Click OK.
Functional Access tab
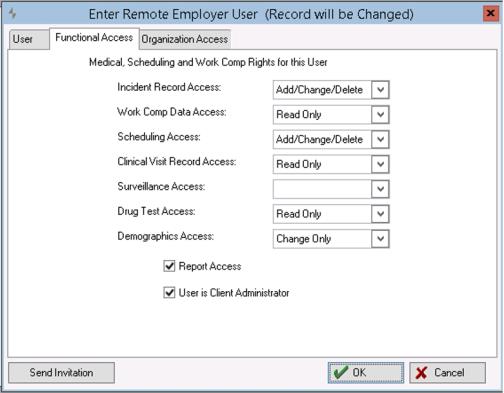
This defines individual user permission levels for each portion of the site or data point within the portal. These permissions cannot be higher than what is set on the Client Access Configuration. For Example: if you have Read only on a field on Client Access Configuration you cannot give an individual user add/change/delete.
For the purposes of this setup process, it is important to point out the "User is Client Administrator" check box; it will determine whether the client can create other users for this employer through the portal.
BATCH INVITATION
Select the Batch Invite Supervisors, button at the bottom of the window. the following window will appear:
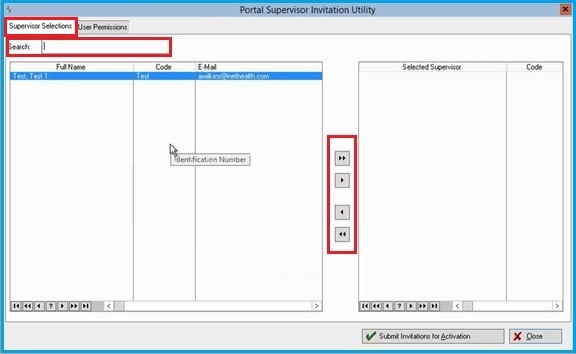
Within the Supervisor Selection tab, you may search for particular users or use the arrow controls in the center to select all (double arrow) or select individually (single arrow). Move users from left to right to include in the batch invitation process. Only users already existing in your database are eligible for the batch invitation.
The User Permissions tab will display the following window:

This window may be used to set the Portal permissions for the entire group of users that are being invited through this particular batch process.
When you have added all of the desired users and selected their permissions, click the Send Invitations for Activation button on the bottom of the window.
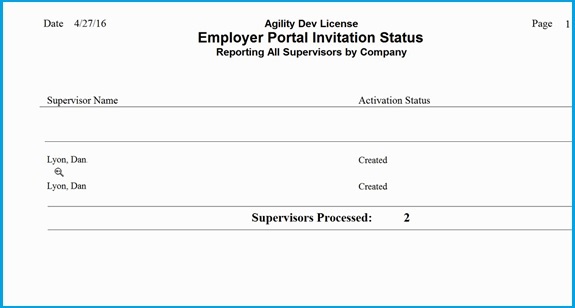
The system will return a Portal Invitation Status Report to display the results of the batch invitation.