How To Set Up and Assign An Authorized Representatives
Summary
Authorized Representatives is a function in the application that allows patient representatives to be setup as authorized medical agents that may act on the behalf of a patient. The relationship is many to many, in that it allows multiple representatives for a single patient or a single representative for multiple patients. Each representative has a single profile that may be attached to multiple patients.
Setup Patient Representative
Representatives may be set up in the application from the Navigation bar
-
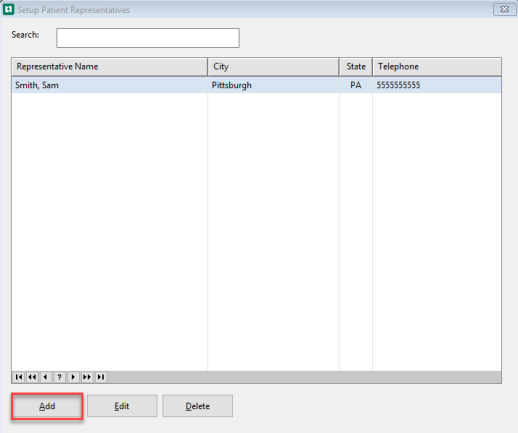
Select Representative

-
The Setup Patient Representatives window opens
-
Select Add
-
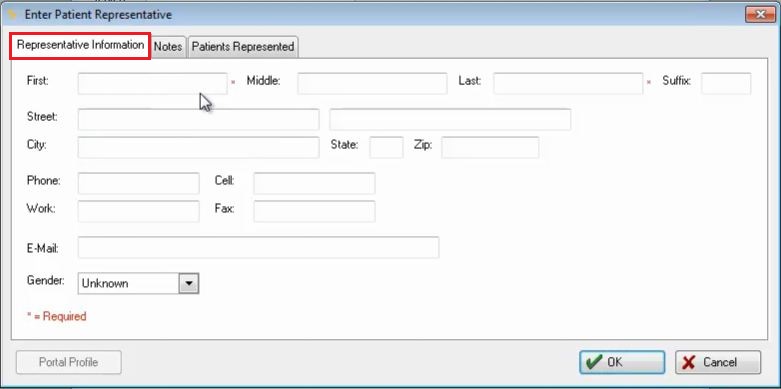
The Enter Patient Representative window opens
-
Required fields are marked by a red asterisk
-
Complete the Representative Information tab
-
Notes tab allows the user to enter any notes needed for this representative
-
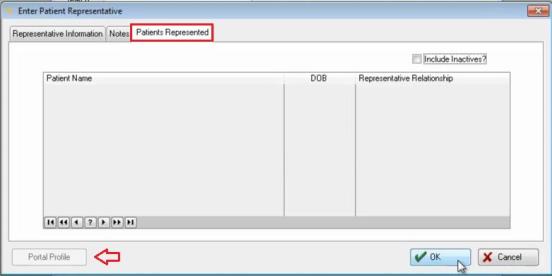
Patient Represented tab shows all patients that are assigned to this representative
-
Once the information is entered, the Representatives Profile will be established, but it still needs linked to a patient or patients.
Notice the Portal Profile button is not active until at least one patient is linked.
If a patient is also a Representative, he or she will have both a Patient Profile and a Representative Profile.
To connect the Representatives to Patients:
From the Nav Bar:
Select Demographics

Patient Search Opens
Enter Patient Name or Birth Date
Select OK
Enter Patient (patient name, ID #, Company) opens
Select More Demographics tab
Select View Authorized Representatives for this Patient
The Authorized Patient Representatives opens
Select Add
Highlight the Authorized Patient Representative to assign to the patient
Click Select
If the desired Representative is not listed, he or she can be added by selecting the Add button. The list can be managed with all three buttons at the bottom with the Add, Change, or Delete buttons.
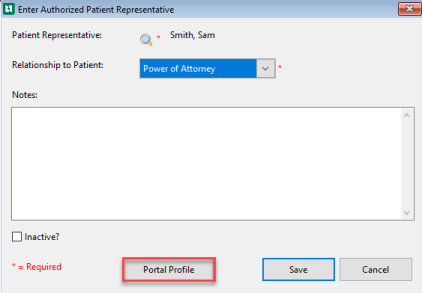
The Enter Authorized Patient Representative opens
Select Relationship to Patient from dropdown
Select Portal Profile to setup the Representative
Portal Profile for (name) opens
Send Activation Email on Commit is checked by default
Select Save to send an Activation Email 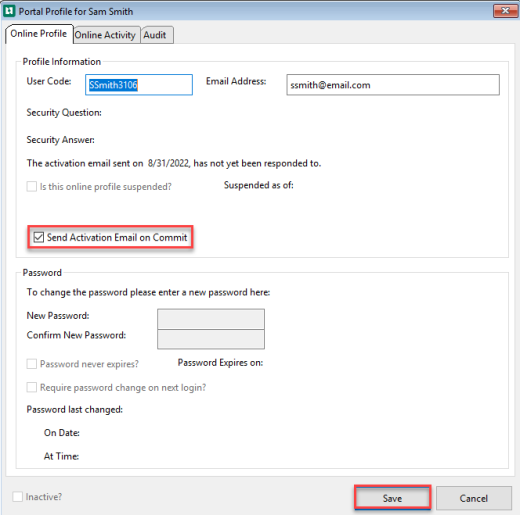
At any time the Authorized Representative can be inactivated by checking the Inactive? checkbox from the Enter Authorized Patient Representative window. This will also inactivate the Portal Profile for this Representative, unless there are other patient relationships linking this Representative to a different patient. Patients have the ability to request that a specific Representative be inactivated for their account.