Using the Clinic Status Whiteboard
Summary
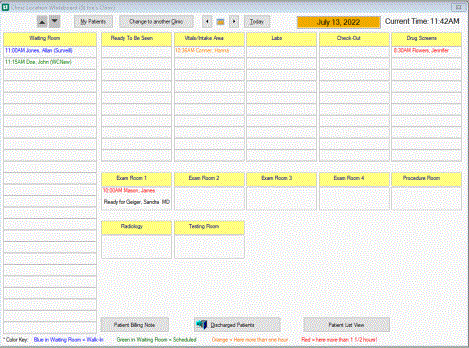
In a large, busy clinic environment, physicians and clinic staff need to have an ability to view the location and status of the patients who are currently in the clinic. This includes their current location, how long they have been waiting, their current status and next step. Traditionally this is accomplished by a centralized Whiteboard". It would also be useful to be able to track the history of a patient's movement through the clinic during a visit.
The Clinic Status Whiteboard provides that functionality, allowing the staff to view the overall status of patients in the clinic, easily move patients from one location and/or status to the next, from the waiting room through discharge. . From this display, providers and clinicians can drill down" to view the detailed status and history of each patient's visit.
Each clinic can be individually mapped to define each patient waiting room, exam / treatment rooms and other handling areas (such as lab, x-ray, therapy, etc.).
Clinic Location View
-
Select My Patients from the top of the window to view only your patients.
-
Select Change to another Clinic to choose another clinic if you have more than one.
-
Select the Calendar controls:
-
The date displayed shows at the top of the window. To the left is Today and two arrows. The left arrow moves back a day. The right arrow forward a day. Today returns to today's date.
-
-
Select Patient Billing Note to view any billing notes for the highlighted patient.
-
Select Patient List View to open the whiteboard displayed below.

At the bottom of the whiteboard the patients are color coded.
Patient List View
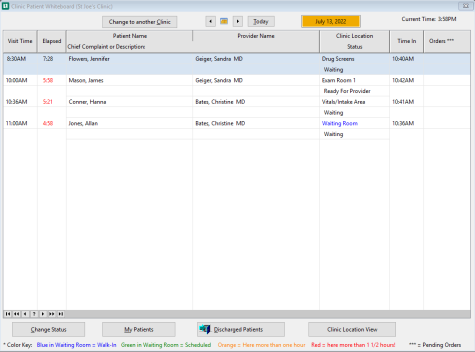
The other Whiteboard display is the Patient List View, this lists all patients regardless of what Clinic they are being seen in.
-
Select Change to another Clinic to choose another clinic if you have more than one.
-
Select the Calendar controls:
-
The date displayed shows at the top of the window. To the left is Today and two arrows. The left arrow moves back a day. The right arrow forward a day. Today returns to today's date.
-
-
Select Change Status to open the Enter Visit Status window.
-
Select My Patients to only view your patients.
-
Select Discharged Patients at the bottom of the window to view all patients checked out today.
-
Select Clinic Location View to open the whiteboard listing only patients within the clinic the user has open.

At the bottom of the whiteboard the patients are color coded and also defines any patient with pending orders.
-
Blue is for Walk-in Patients and Green designates scheduled patients.
-
The Color code of Orange is if the patient has been in the clinic more than 1 hour and displays in Red if a patient has been in the clinic more than 1-1/2 hours.
-
*** denotes Pending Orders but is only visible on the Patient List View.

Using the Whiteboard steps below remain the same using either of these views.
Using the Whiteboard to Manage Visits
Much of the work of managing visits can be done from this one location without closing the window. Several of the options are selected from a pop-up menu which appears when you right click a patient's name. The options available on the pop-up menu vary depending on your user access rights.
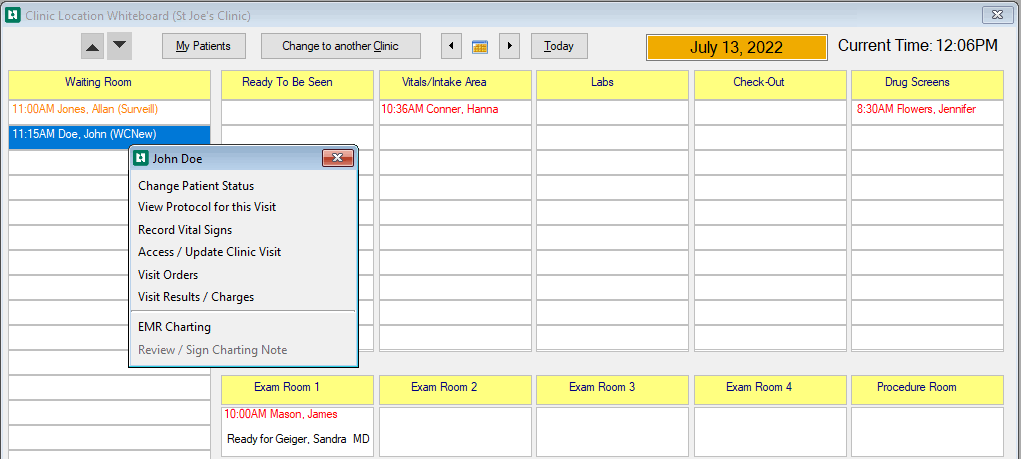
From the pop-up window select the option you want to complete.
-
Change Patient Status
-
Opens the display the Enter Visit Status window.

-
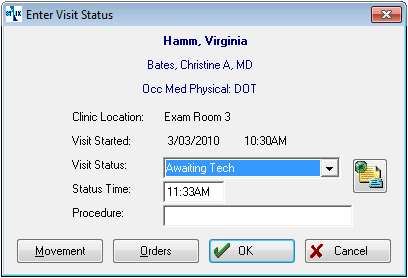
Below defines each of the selections on the Enter Visit Status window. Use these to move and track the patient throughout their visit.
-
After Completing this window select Save to return you to the whiteboard.
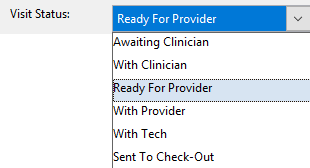
Options Descriptions Clinic Location Use this dropdown to move your patient around on the whiteboard. Or you can drag and drop the patient to the next area. Visit Status If selected from the Multiple Patient areas of the whiteboard displays the options you created for Status Values for Multiple Patient Stations.
If selected from an Individual Exam or Treatment Room it will display the options created for Status Values for Individual Exam & Treatment Rooms
Start time Displays the time the patient entered each area on the whiteboard. This can be overwritten. Procedure This field allows the person who moves the patient to the area to inform the person who will see the patient what needs to be done. Movement Selecting Movement opens the Visit Status History window. This allows the user to see where and at what time the patient was moved to each section of the whiteboard. Use the red X to close the window. Orders Selecting Orders opens the Orders for this Visit window. From this window you can Add an order (Administer Med, Dispense Med, Lab Order, Radiology Order, etc.). Edit, Delete, Print, Submit and Complete the order. The user can also print Exit Care Patient Education Leaflets.  Send Message or Task
Use this icon to send a message or task to an individual employee or to a role. -
-
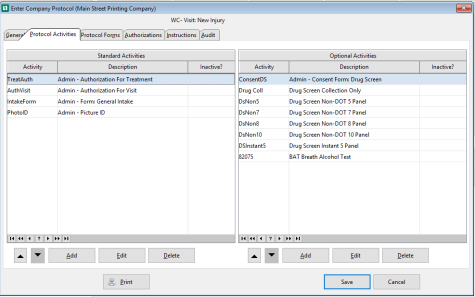
View Protocol for this Visit:
-
Displays the appropriate Visit Category Protocol where you can easily view the standard activities, optional activities, instructions and other information associated with this type of visit.
-
-
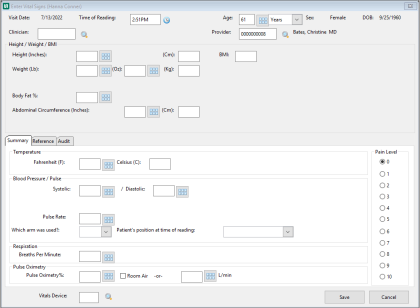
Record Vital Signs:
-
The Enter Vital Signs window opens, enter vitals for the highlighted patient.
-
-
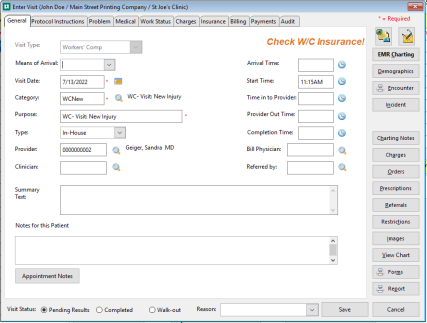
Access / Update Clinic Visit:
-
Reopens the Enter Visit window.
-
-
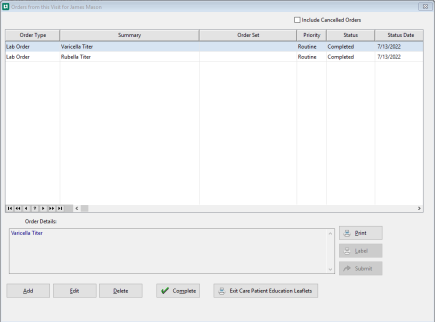
Visit Orders:
-
The Orders button shows all doctor's orders which have been entered on the visit. From this window, the status of each order can be updated.
-
-
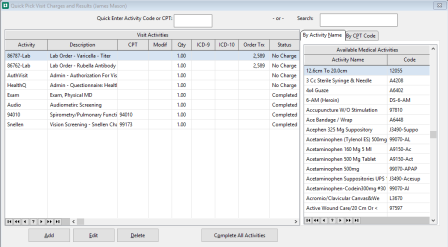
Visit Results / Charges:
-
Opens the Quick Picks Visits Charges and Results screen for the highlighted patient.
-
-
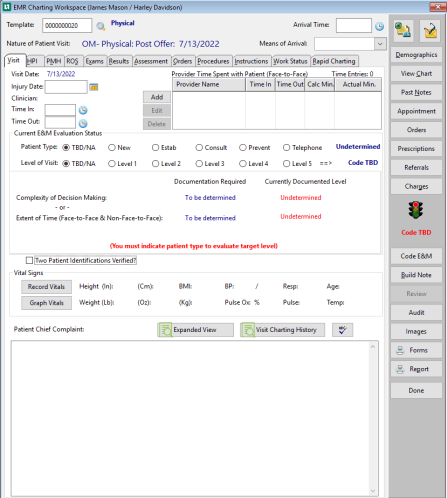
EMR Charting:
-
Go directly to the Charting Workspace.
-
-
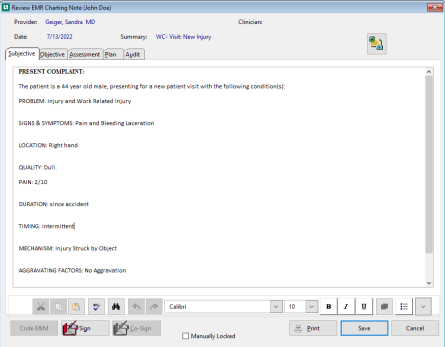
Review / Sign Charting Note:
-
Open a saved charting note for review.
-
-
Changing the Patient Status by Moving Patient on Whiteboard
-
When you drop the patient in the new location, the Enter Visit Status window will be displayed. The current time will be displayed, indicating the time when the patient was moved. It can be overwritten.
-
A default Visit Status will be displayed. Change it if appropriate.
-
