Checking In a Walk-In Visit
If you haven't already done so, please read the Patient Check-In Overview and How to Add a Patient topics before continuing!
Summary
Walk-in visits can be logged from the Home Nav bar or from the Appointment Calendar.
Steps to Checking In a Walk-In Visit
-
On the Home Nav Bar click Check-In.
-
If working from the appointment calendar, click Check-In a Patient
-
-
Log a Visit or Encounter window opens
-
Select Log a New Walk-in Visit
-
Select Patient window opens
-
Enter name
-
Click OK
-
Select Patient (Across All Organizations) window opens
-
Locate the patient and make sure the correct company is selected or if Private Practice click Select Private Practice button (this will open the Enter Visit window).
-
If Occupational Medicine visit Click Select from the bottom of the window.
-
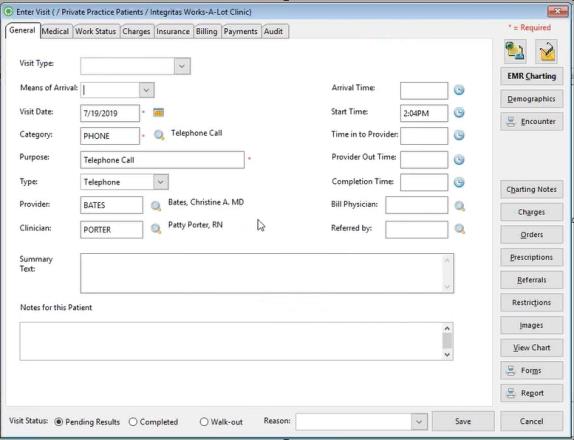
Enter Visit window opens
-
Select the Visit Category.
-
If this is a Workers' Comp initial visit a message will ask if you want the software to automatically create an incident record.
-
If you select Yes: the program will create the incident, then open the [Enter Visit] window.
-
The Enter New Incident Information pop-up window opens
-
Enter Incident/Injury Date
-
Reported Date automatically defaults to current date but can be changed
-
Select OK to continue
-
-
If you select No:
-
Select from existing incidents for patient / company
-
-
If this is a Workers' Comp recheck a message will ask if that is what you want to do.
-
If you click Yes:
-
Select appropriate incident
-
-
If the correct incident is not there, you can select Add to create it, and then select it.
-
If you do not select an incident, you cannot enter this as a Workers' Comp visit.
-
-
Enter the Start Time by typing it in or by clicking the button beside the field.
-
There are two optional fields that are not typically used:
-
Enter a physician referring the patient to you in the Referred In field.
-
If the Provider works under the supervision of another, enter the one in whose name the visit is billed in Billing Physician.
-
-
Select the Protocol Instructions tab and read the instructions for Check-In, if any.
-
Select Demographics and confirm the patients information. Then select Save if changes were needed or Cancel.
- Appointment Notes button: Use this button to display any Appointment Notes or Reservation Notes corresponding to the Visit. If there are no Appointment Notes or Reservation Notes for the Visit, the button will not display. If either Appointment Notes or Reservation Notes exist for this Visit, the button may be selected to display a separate pop-up window containing the text of those notes in read-only mode. Click OK to exit the pop-up window. Using the Appointment Notes button is not reflected as an action within the audit record.
-
Select the Encounter button and print the Encounter Form.
-
Select Save to close the window
When a walk-in visit is logged, a flag is set in the visit record indicating that is was a walk-in instead of scheduled visit. The Visits Analysis Report and Visit Time Comparison Report can both separate scheduled vs walk-in visits.